Showing posts with label Great Britain. Show all posts

Saturday, February 15, 2014

Richard Pike's signal boxes and some more explanation of tappet locking, 2013

Deutsche Version dieses Postings

A day before we left England, I got a short message from ... Richard Pike!—that "there were three more signal boxes nearby."

I wondered were they would be—no railway line there would still use old signal boxes. Then I found out: Two thirds of Richard's garden are sort of a signalling company's storage, with three fully working complex signal boxes, all connected to a relay simulator built from an old telephone exchange!

I made only a few pictures of the lever frames, as I had too much to ask and listen to during my visit. However, farther below are a number of photos from the locking bed of the tappet frame which (if I remember correctly) was brought to life again by Richard—I'll use them to explain a little bit more about tappet locking!

But let me start with some shots of Richard's working frames.

First, there is the mechanical frame of Ely North Junction:
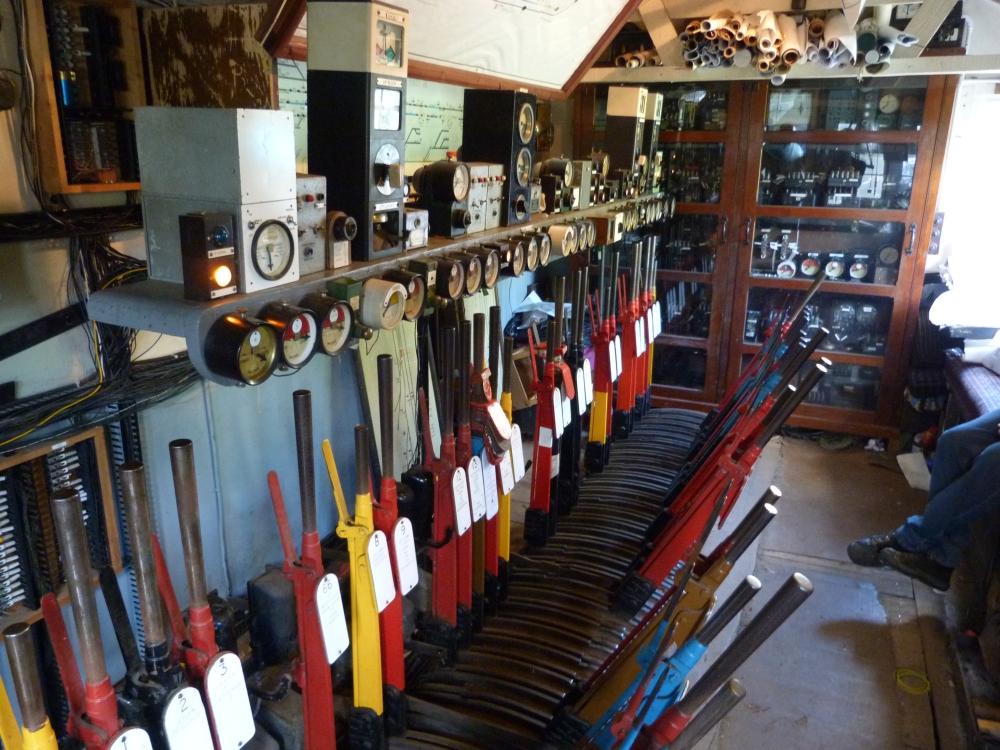
Ely North Junction frame at Richard Pike's, 30.8.2013
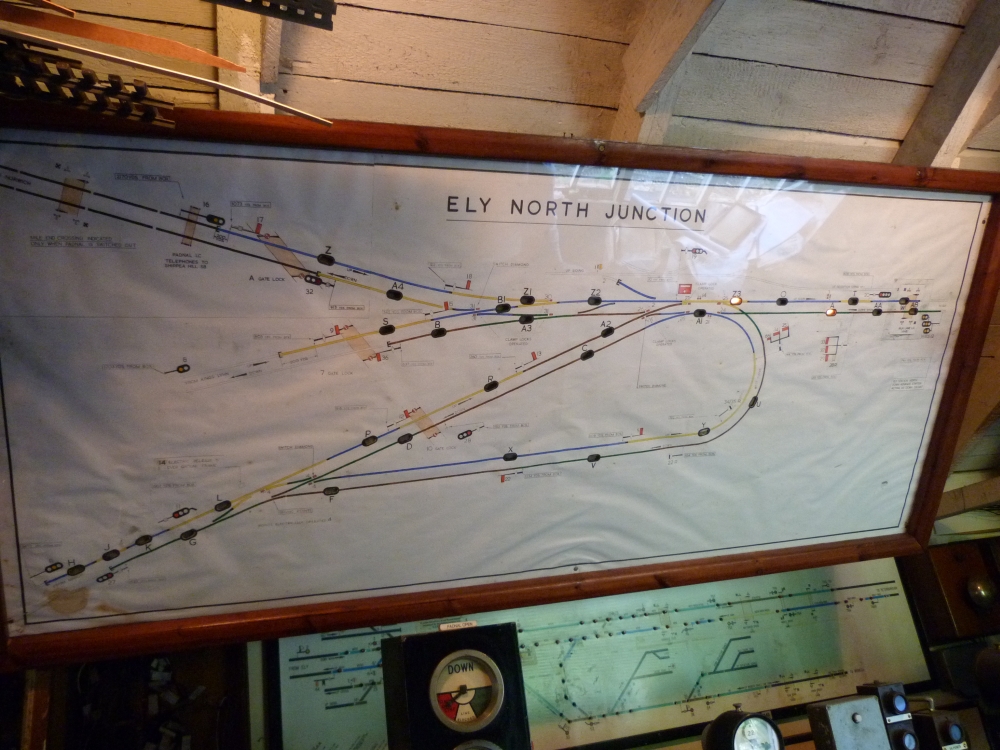
Ely North Junction frame at Richard Pike's, 30.8.2013
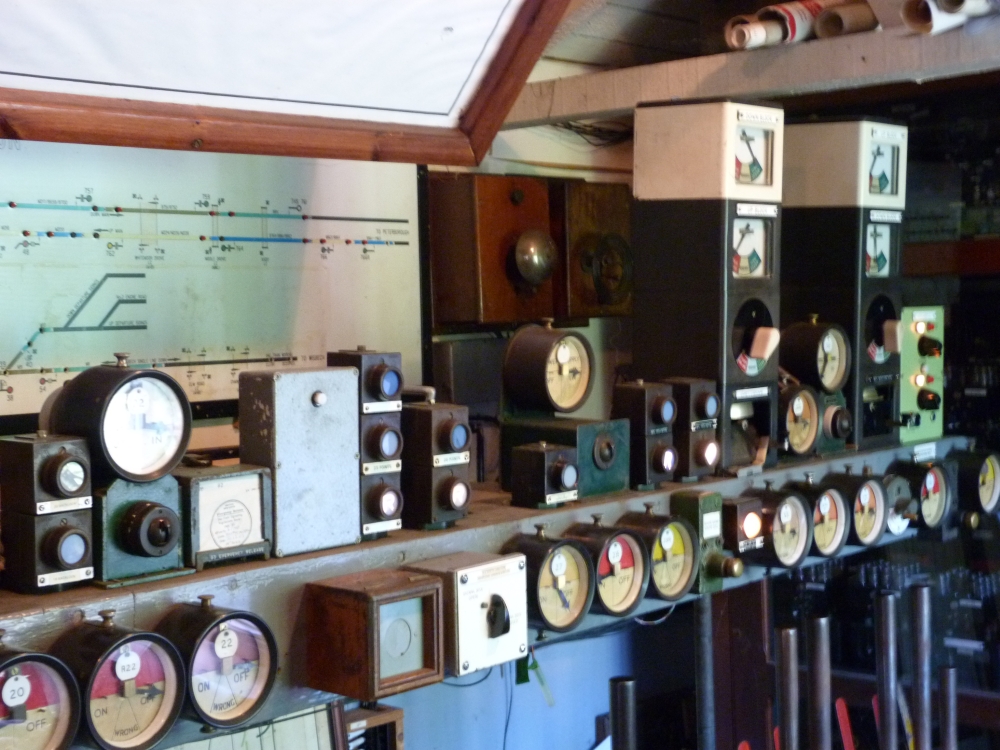
Ely North Junction frame at Richard Pike's, 30.8.2013
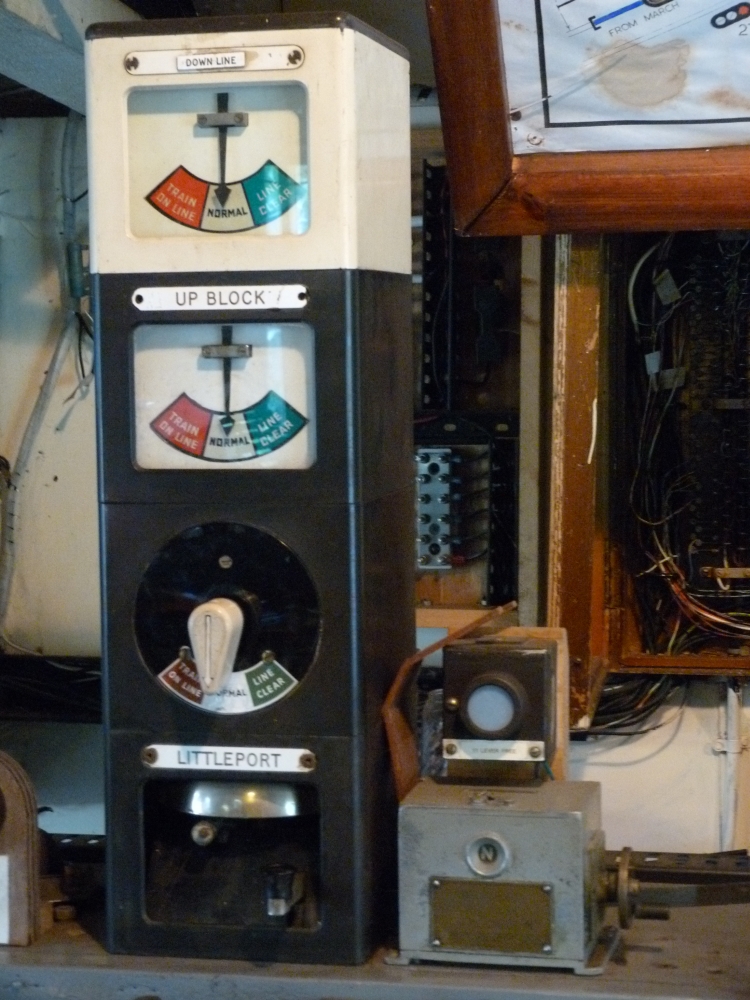
Ely North Junction frame at Richard Pike's, 30.8.2013

Then, there is the electro-mechanical frame of Ely Dock Junction:
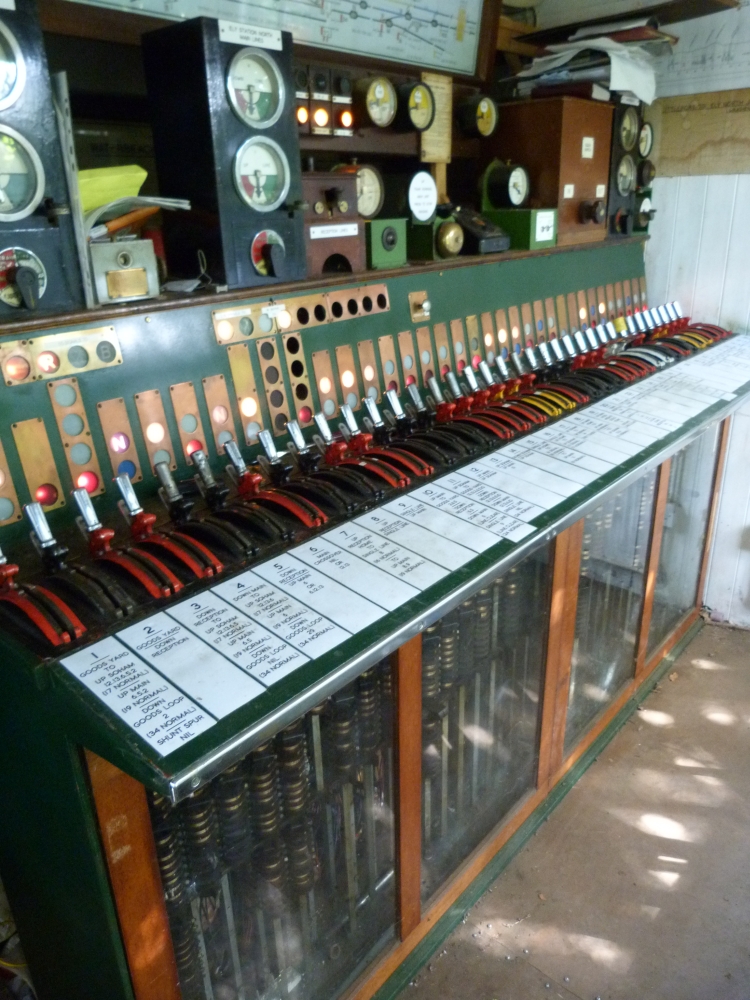
Ely Dock Junction frame at Richard Pike's, 30.8.2013
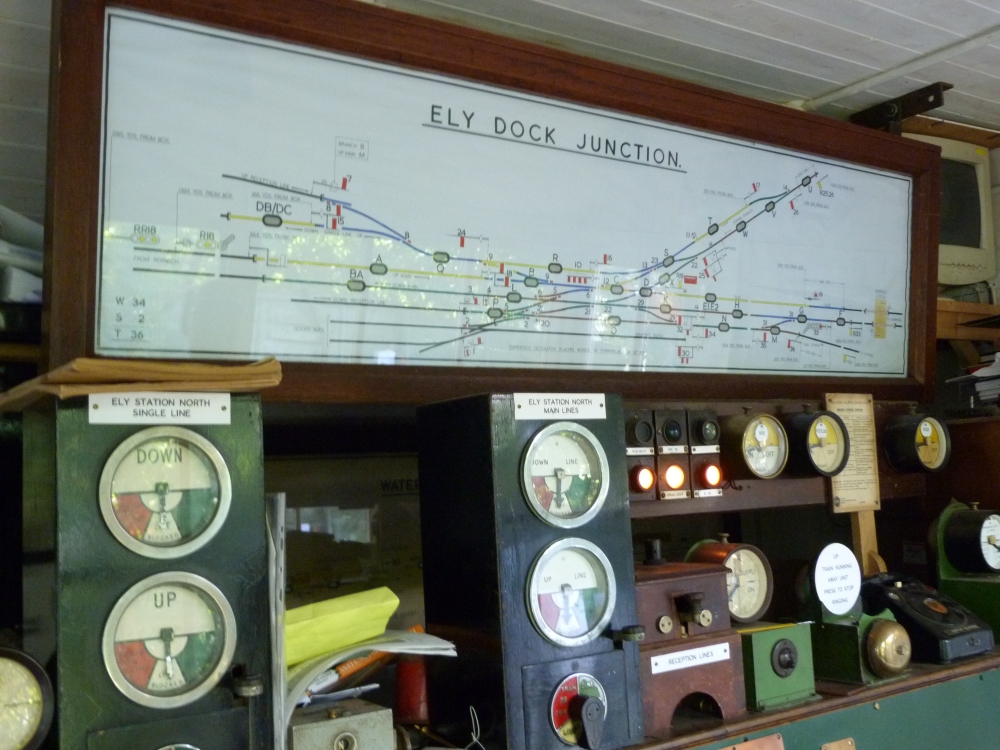
Ely Dock Junction frame at Richard Pike's, 30.8.2013

And finally ... unfortunately and for no reason I can remember, I did not take a picture of the third mechanical frame. However, part of Richard made it on the following shot:
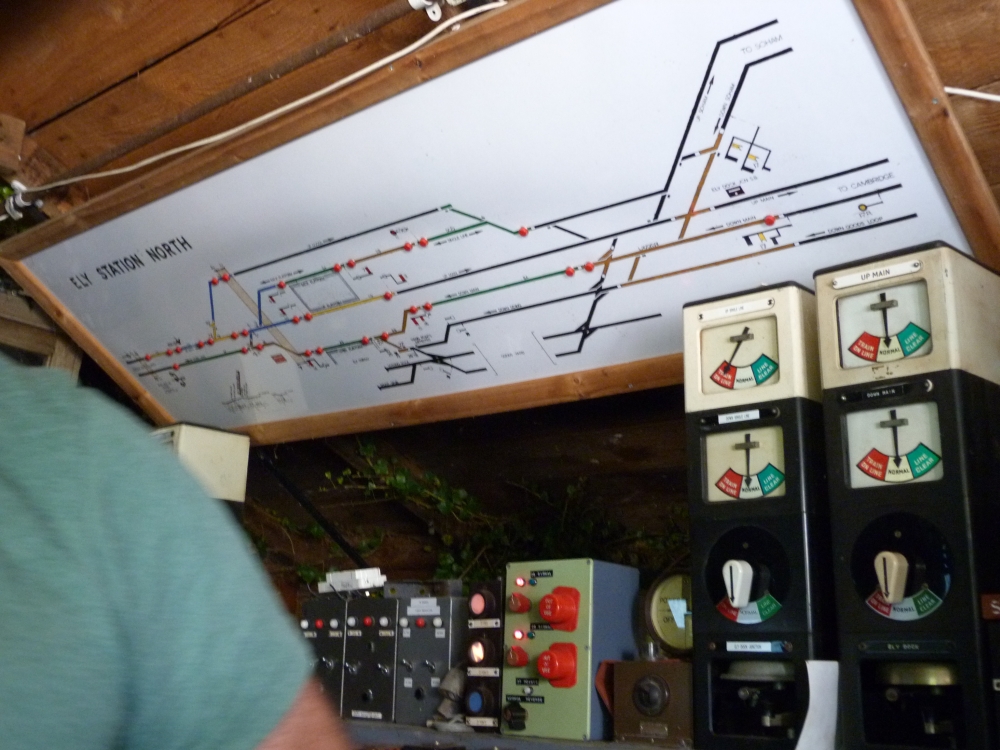
Ely Station North frame at Richard Pike's, 30.8.2013

Outside, Richard has got quite a number of signalling equipment:
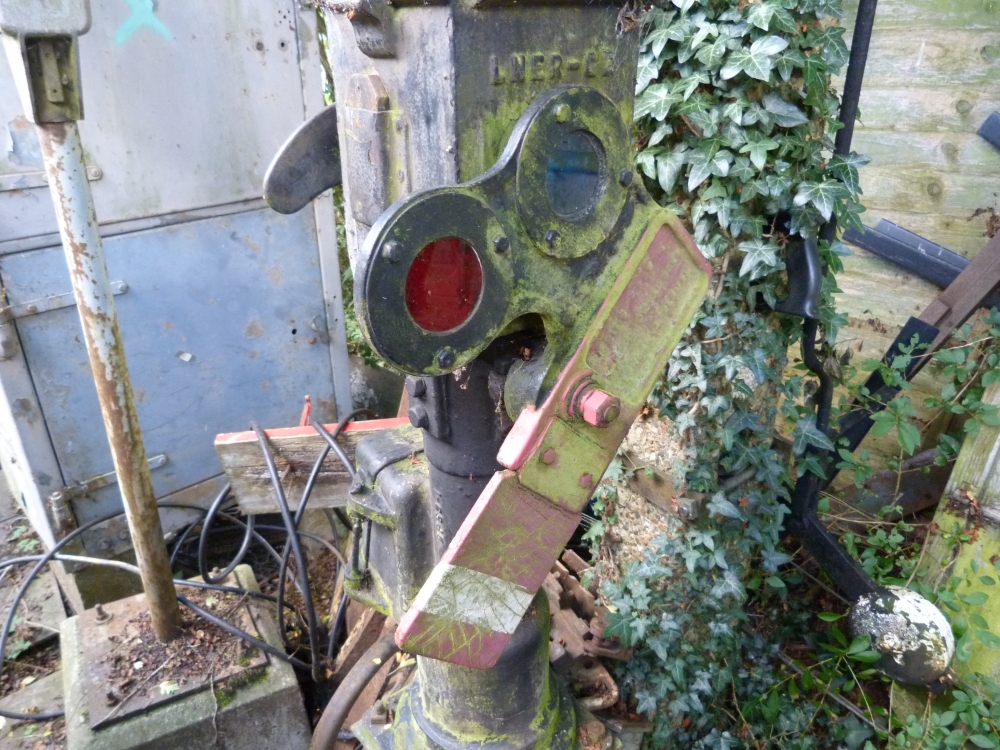
Shunt signal partly made of rubber (to reduce the risk of injury) at Richard Pike's, 30.8.2013
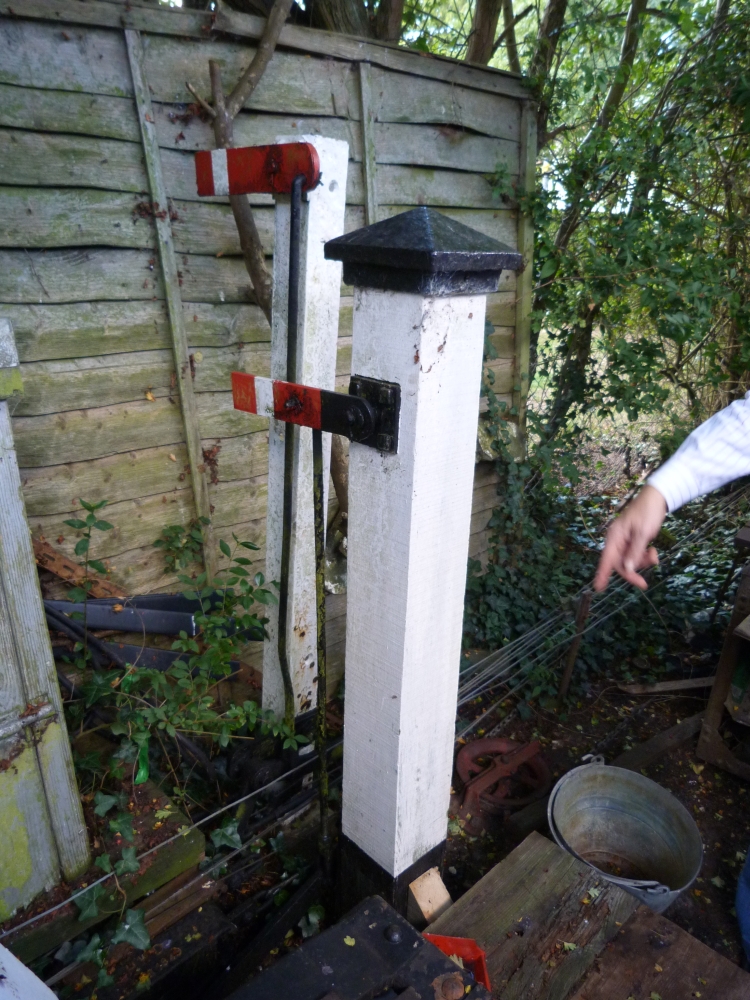
30.8.2013
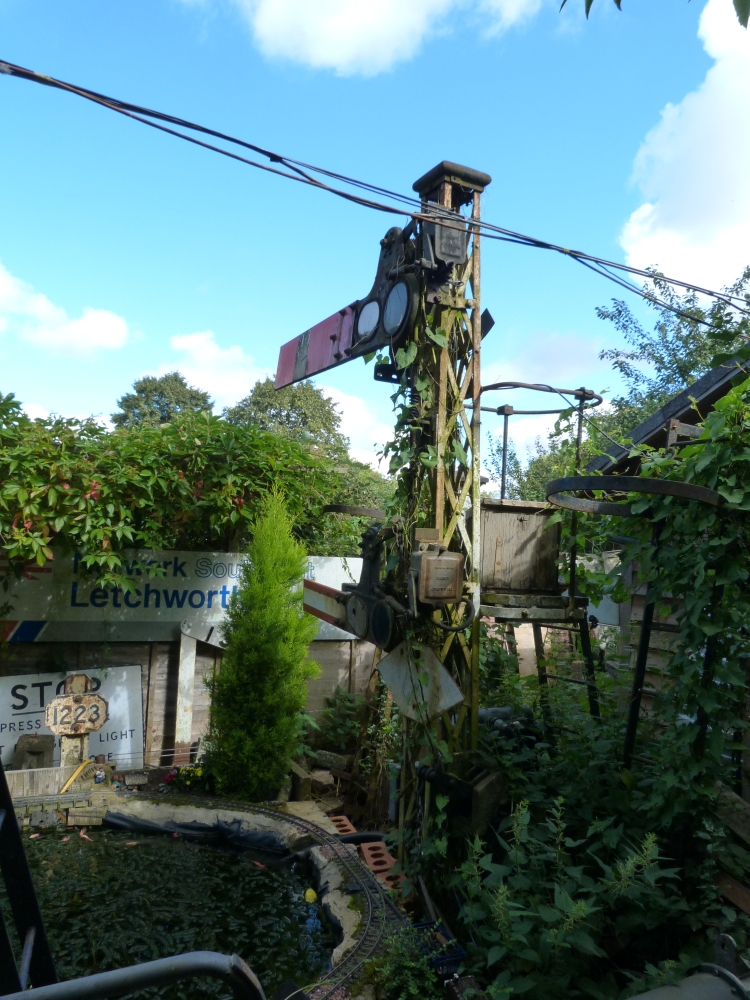
30.8.2013

Richard was, as remarked above, preparing a small ground frame. A few parts with fresh brown paint were drying:
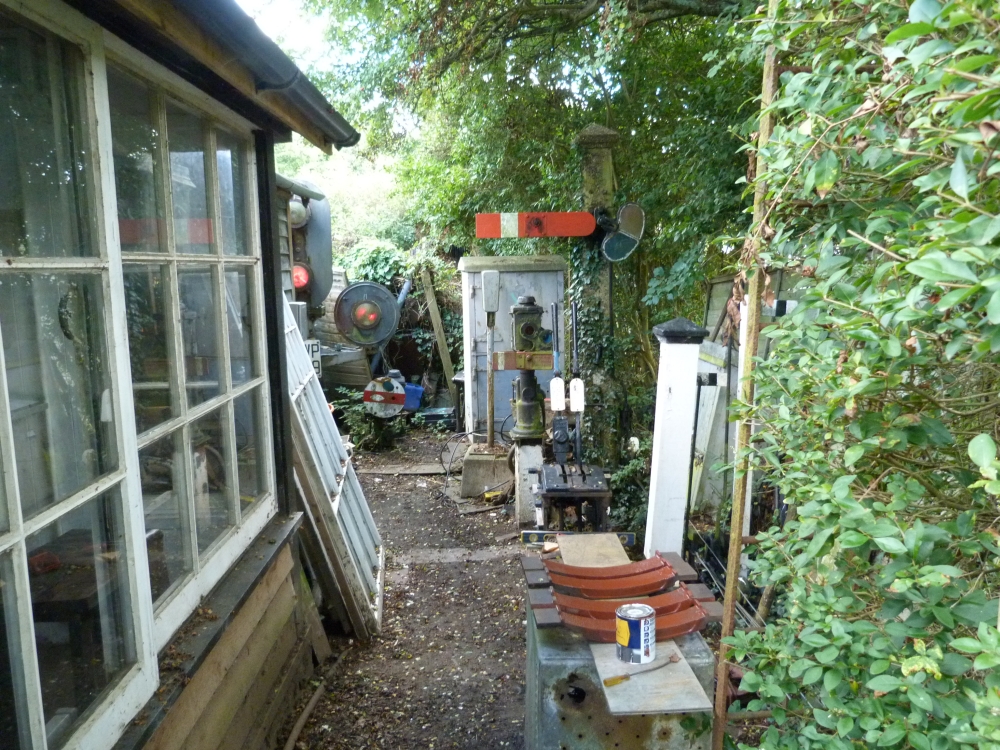

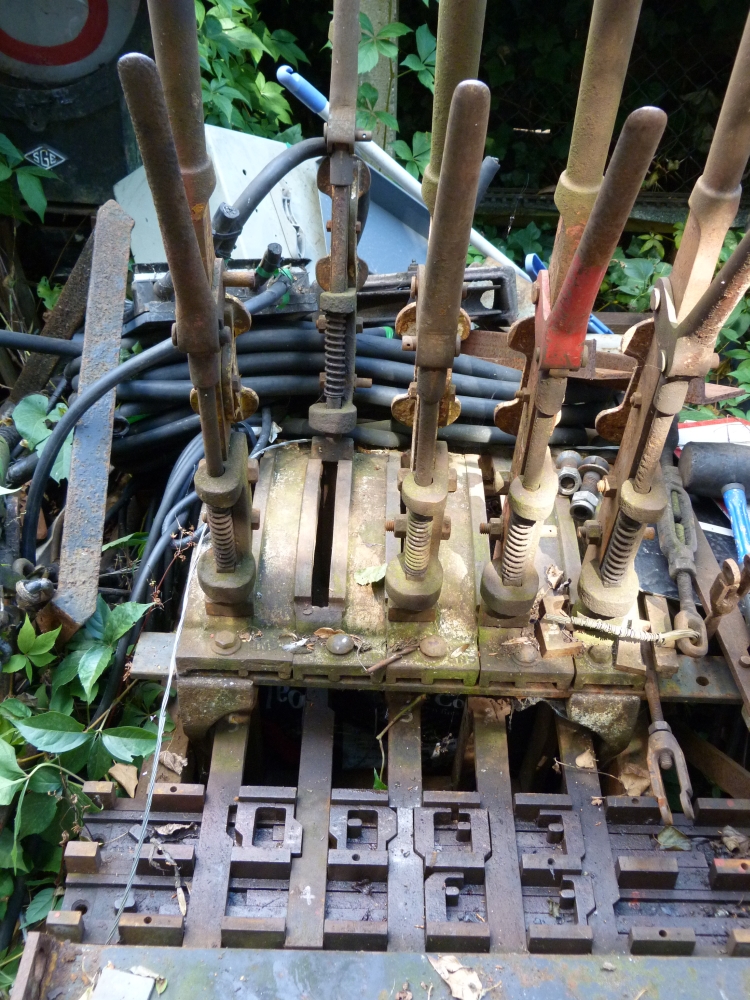
And here are the final signalling-related pictures from our vacation in England, explaining the typical parts of a tappet frame. The frame is shown here from the back side, and the locking bed has already been opened. Some tools and some—well—other things are lying near and on the frame—so it goes ...
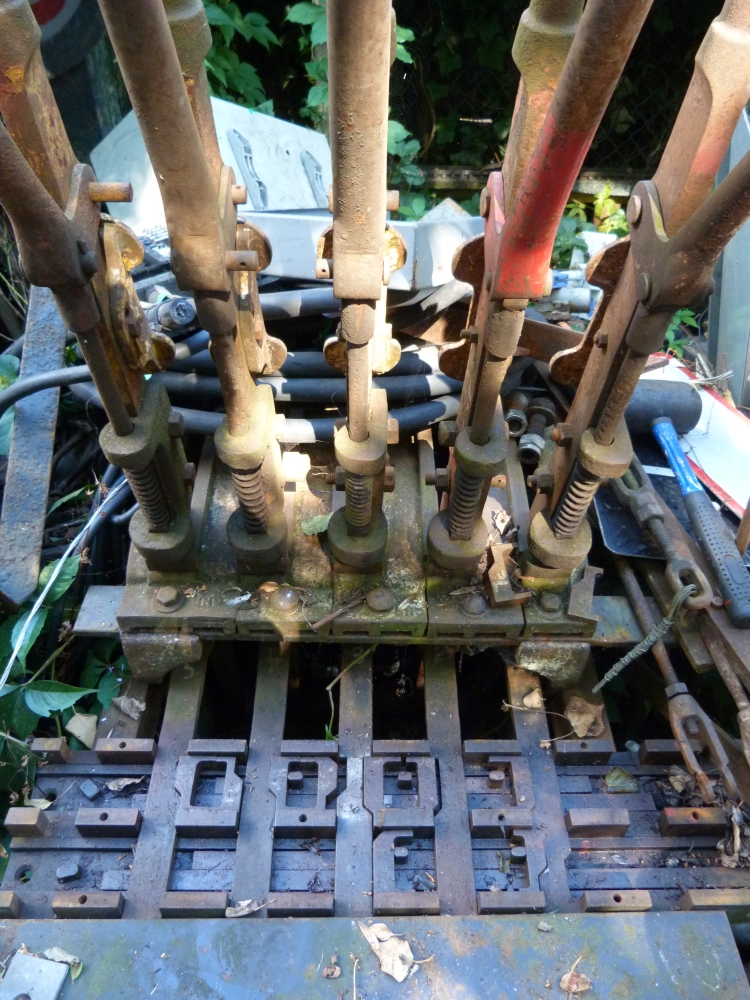

Here is a closer look at the locking bed. It is a quite simple locking bed—there are much trickier ones. However, it shows a number of typical patterns how levers lock each other which I'll shortly explain:
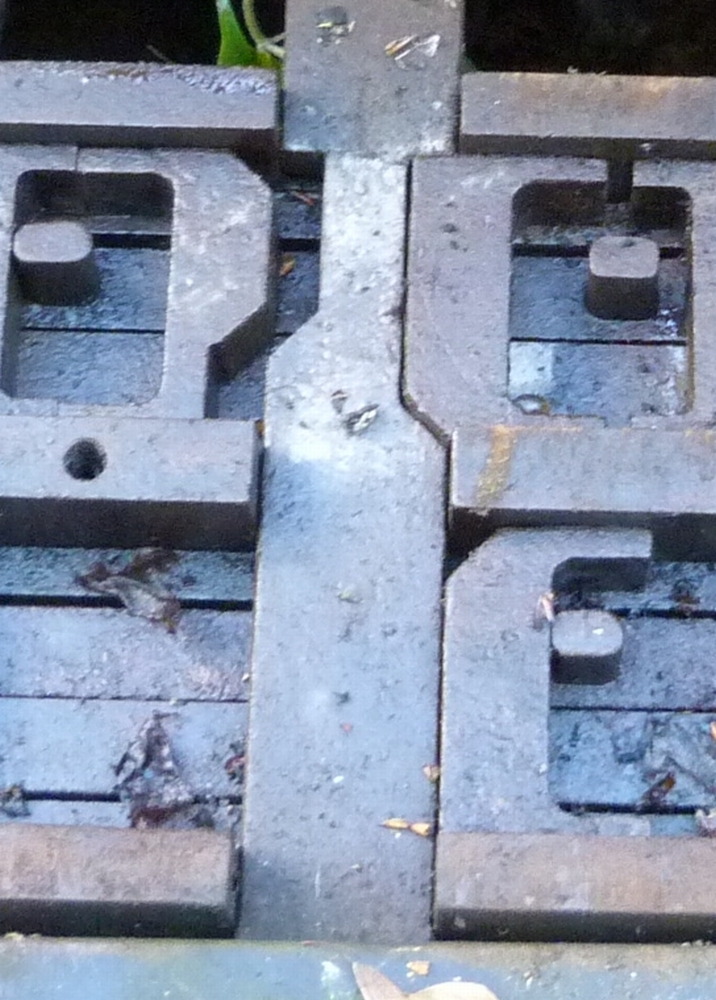

At first, we look at two neighbouring levers that lock each other like the ones in the ground frame at Wansford. Here, one can see the two tappets, with a pair of wedges between them. The left lever is locked in this situation—can you see why?
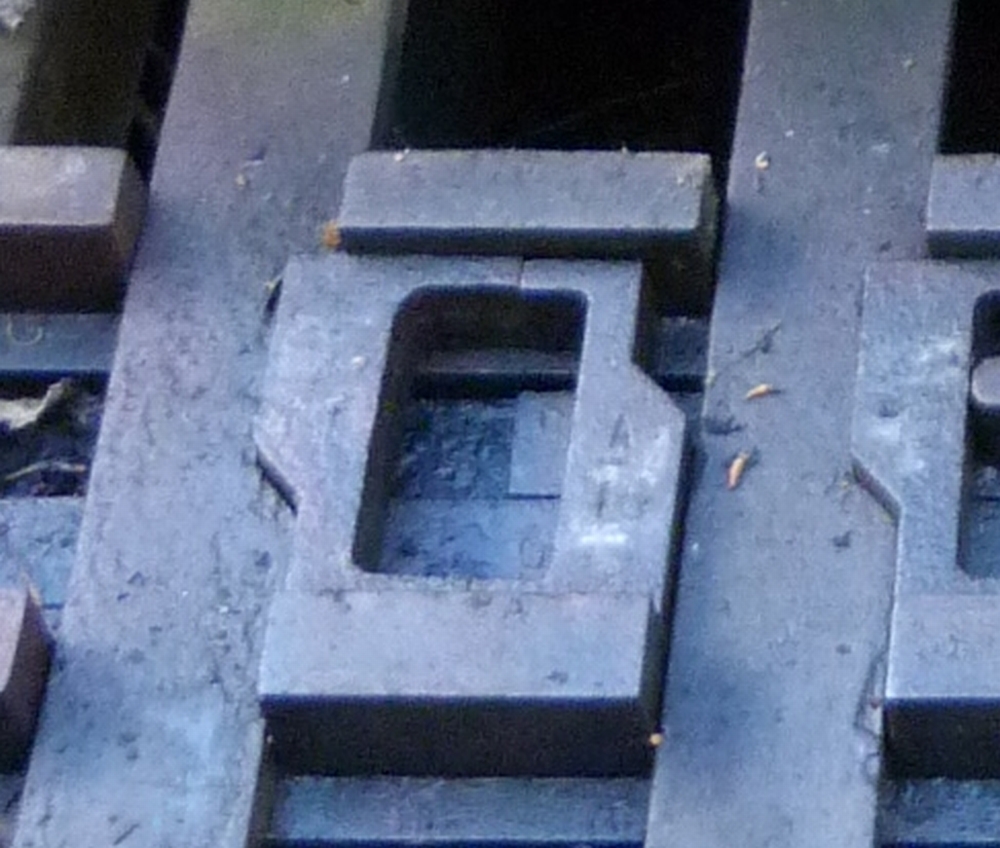

Here is the explanation:
  • In order to reverse the left lever, its tappet (the flat iron) would have to move (towards the top of the picture).
  • This would force the left wedge to the right, via the short tapered edge.
  • But this would also have to move the right half of the wedge pair (as the wedges touch each other at the top and the bottom), ...
  • ... which is impossible as there is no cut corresponding to the wedge in the right tappet!
So the left lever is locked in place.

How can the left lever be unlocked? For that, the right lever must be reversed. Here we see the first fraction of it smovement—the cut on the right has moved (up, in the picture) a little bit (thereby, the wedge on the right wide has been pushed out—but we'll ignore this for the moment). The left lever, by the arguments above, is still locked:
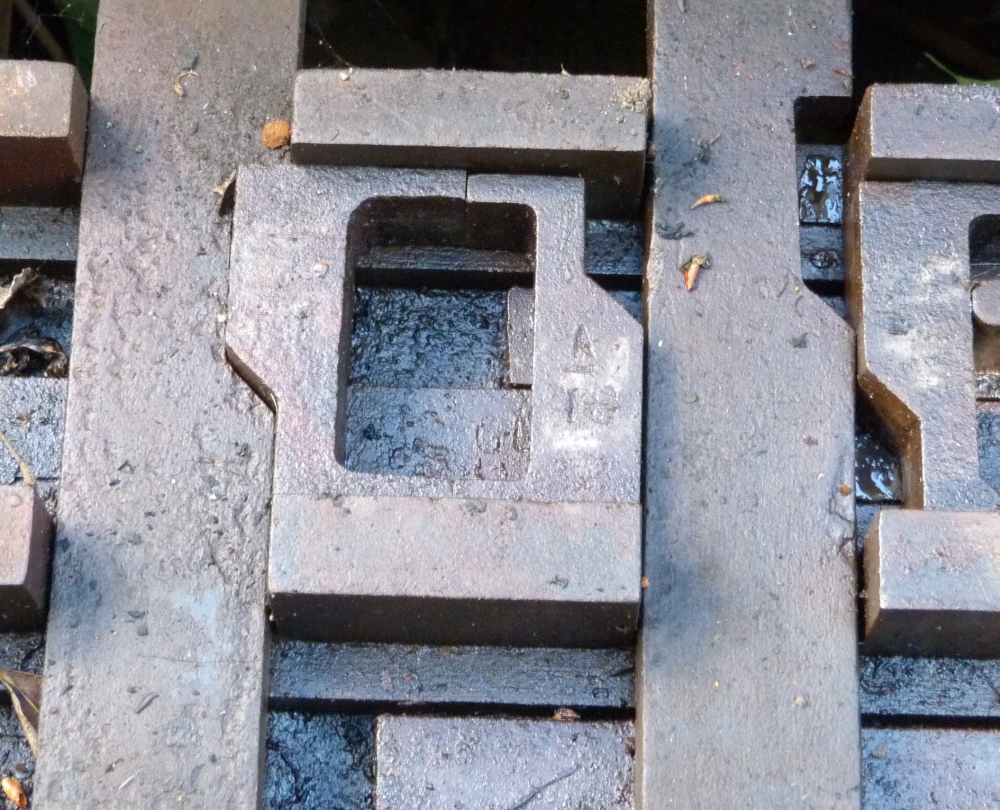

When the right lever has been completely reversed, a cut in its tappet is now positioned opposite the wedge. This, of course, finally allows the wedge to move to the right if pushed by something! (Sorry for the hand in the photo ... it's probably mine, but I don't know why it's there ...):
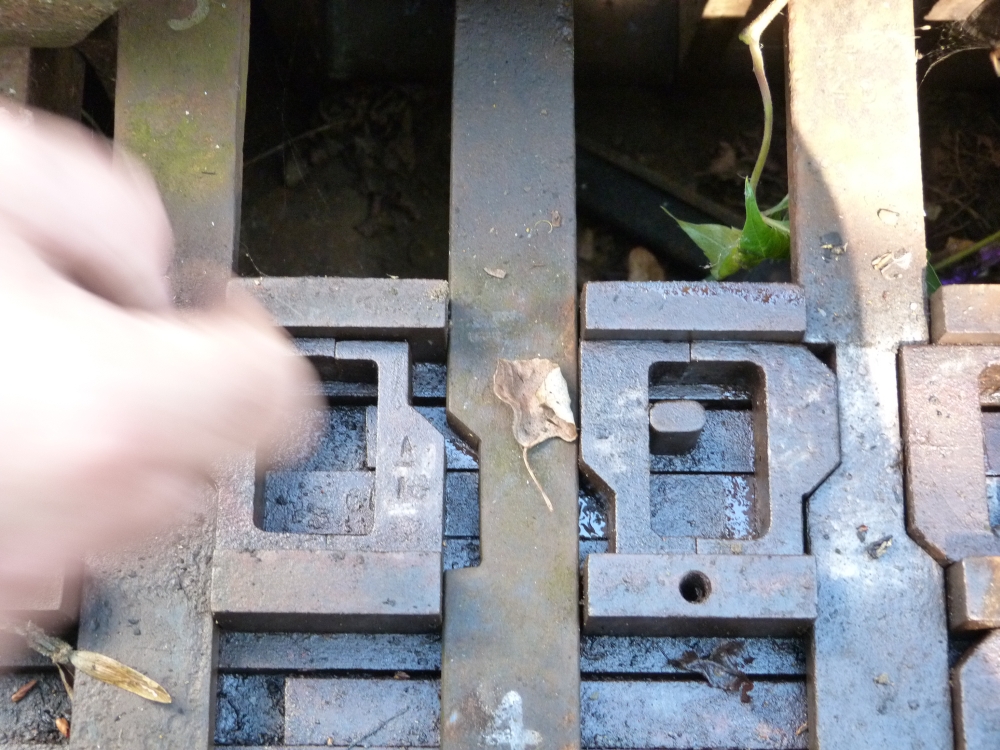

And now the left lever can be moved! Here we see that its tappet has already been pulled (again upwards, in the picture) by its lever. The taper at the cut has forced the left half of the wedge pair to the right, which in turn has pushed the right half into the matching cut of the tappet of the right lever—which, therefore, is now itself locked into its place!
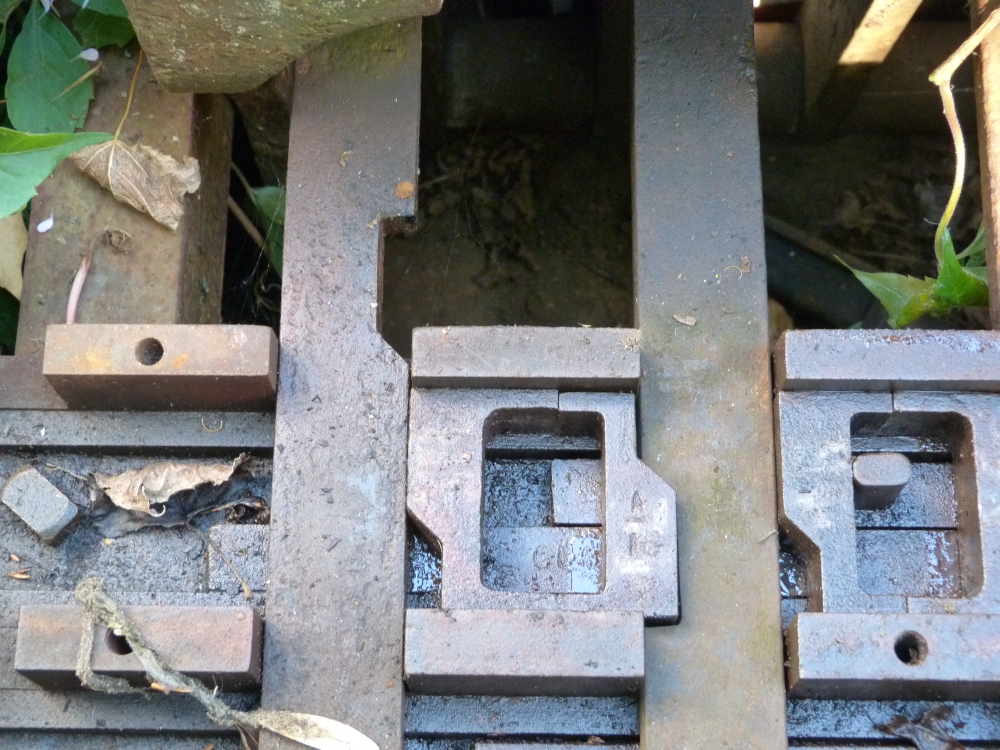

If the leftmost lever is moved back, the cut in its tappet will of course again be aligned with the wedge—but the wedge will remain outside the cut until the movement of another lever forces it back. Here is the situation after the first lever was moved back:
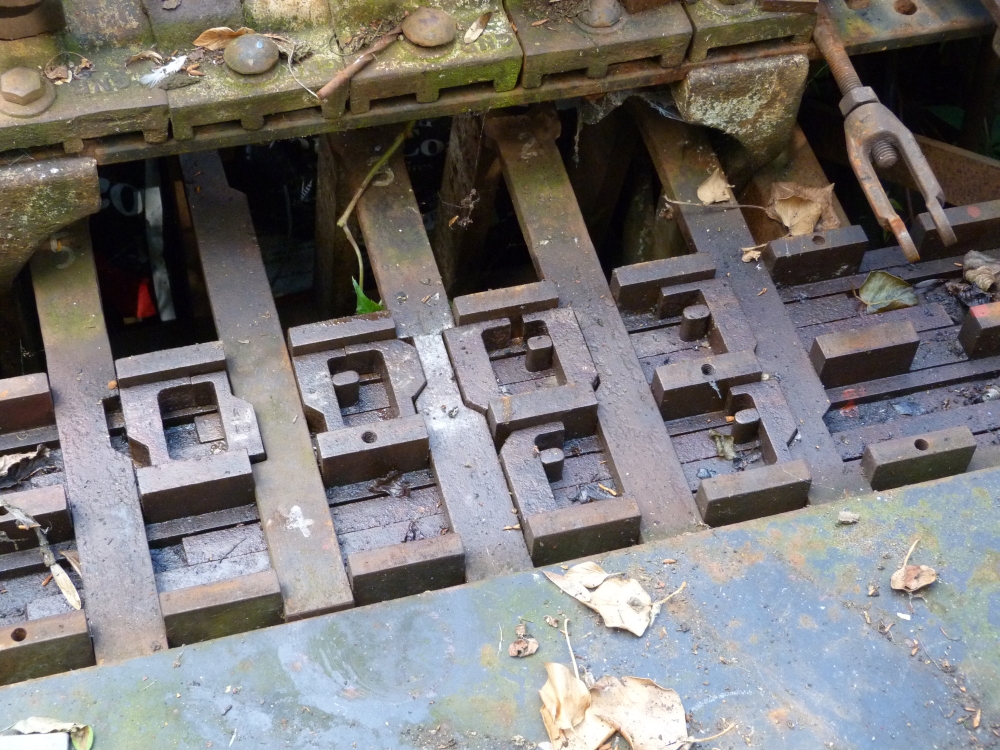

Four pictures up, you can see the situation where the wedge has been forced back into the cut in the left lever's tappet.

Up to now, we have only dealt with neighbouring levers. However, in many cases it is necessary to lock levers that are not neighbours of each other. This is where connecting rods become necessary. The next picture shows a simple example: There are three levers—left, middle, and right. The left lever should be locked against the right one, with no locking logic for the middle. The solution is easy:
  • The two wedges are placed against the corresponding tappets.
  • Below them, a connecting rod is placed with two noses that push the wedges.
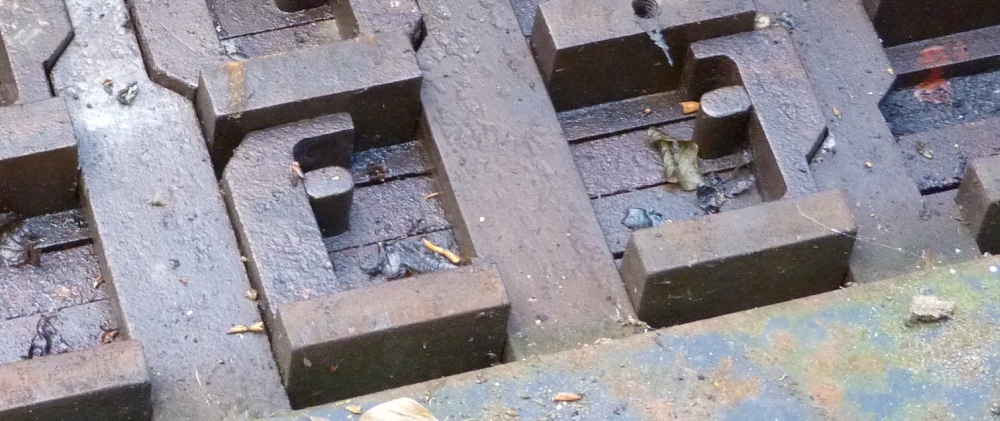
I think it is clear that this part of the apparatus behaves exactly like the one above, only now for two levers some distance apart:


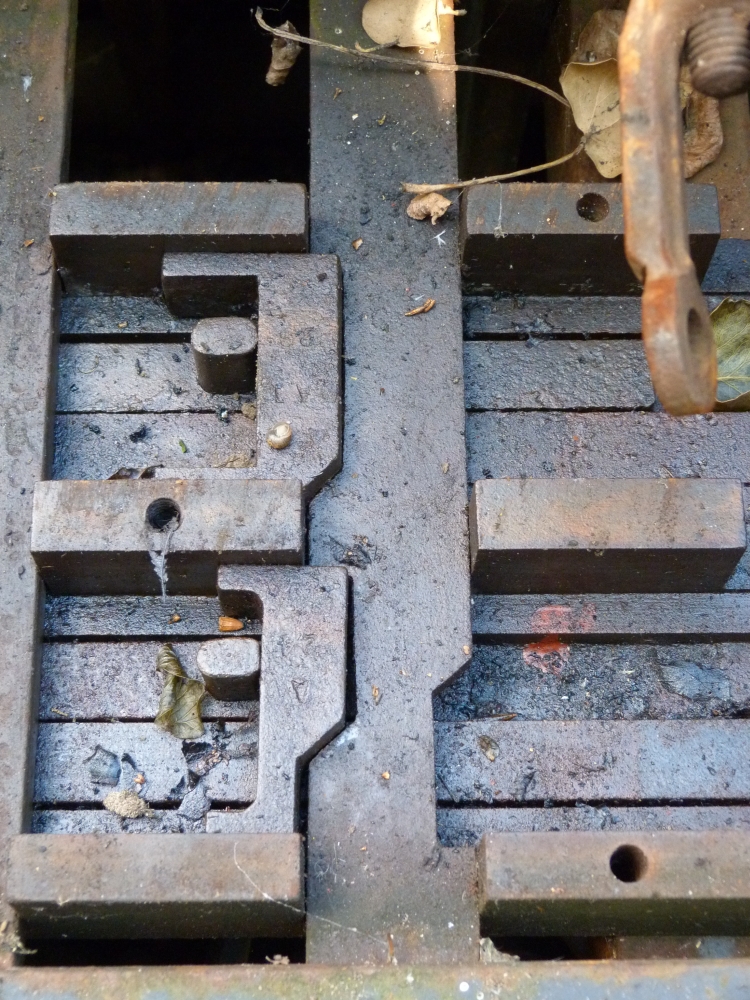
One can see that two noses project from the connecting rod that push or are pushed by the wedges. However, the connecting rod is not centered, but somewhat offset. This makes room for another connection rod which can connect other wedges in the frame. In the locking bed shown here, the trough where the connecting rods run can contain two connecting rods; in other designs three or even five rods could be placed in one trough. But of course, more than one trough might be necessary:
  • Either because more connection rods are necessary than would fit into one trough;
  • or because a tappet has to be locked with more than two wedges (only two wedges per tappet per trough are possible, one on each side).
In this frame, the center tappet engages with three wedges, therefore at least two troughs are necessary:


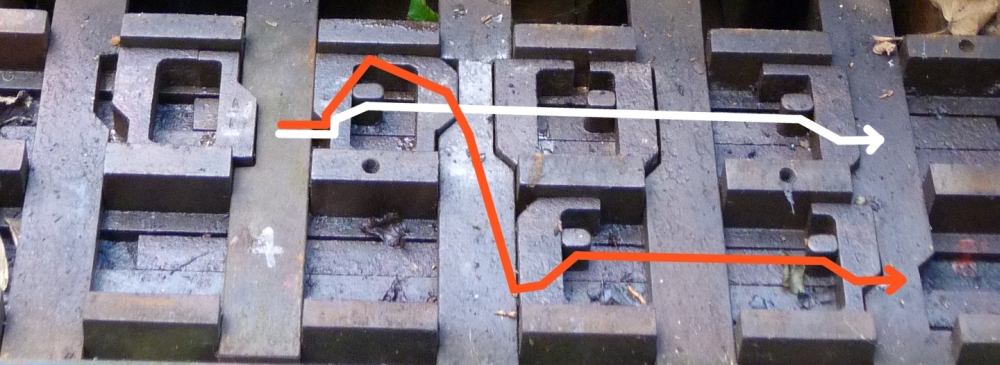
Of course, a single lever can lock more than one other lever. Typical examples of this are signal levers which lock all the points levers (or the facing point lock levers) that are guarded by the signal. In this frame, there is an example where a single lever locks three other levers: If the leftmost tappet in this frame is moved, its wedge (marked red)
  • ... will directly push over the wedge marked white;
  • ... will push the connecting rod with the nose seen in the red area, which in turn ...
  • ... will push (with two more noses) two wedges against the tappets of the remaining two levers in the picture.
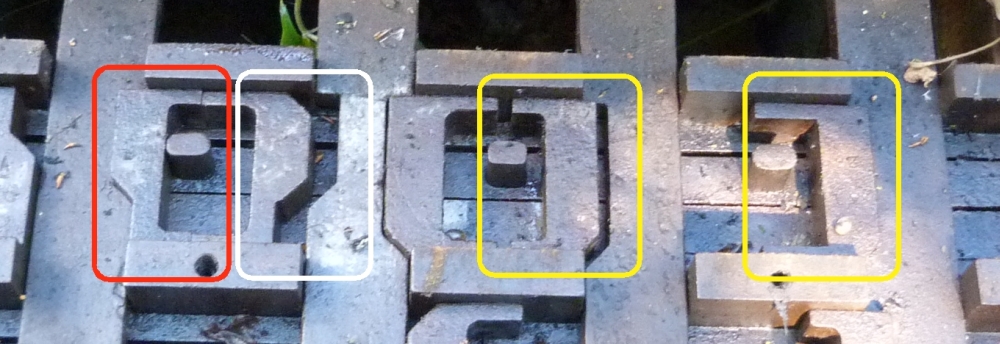
So the leftmost lever here locks all other three levers if it is reversed:


The next picture shows the situation when the lever has been reversed:
  • The tappet (1) ...
  • ... has forced the wedge (2) ...
  • ... to the right, so that it pushes (with the protrusions at its top and bottom) the next wedge (3) into the neighbouring tappet's cut and locks it into place.
  • Moreover, the wedge (2) pushes the nose (4) to the right, which shifts the connecting rod (5).
  • With its nose (6), the connecting rode pushes the wedge (7) into the cut of the tappet (8), thereby locking this tappet.
  • Also, the nose (9) shifts the wedge .......
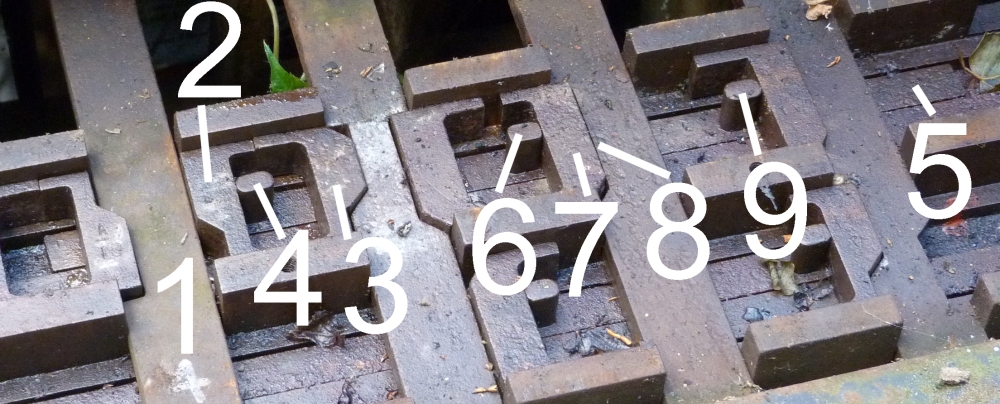
... and here I ran out of numbers. I think you get the pattern:


The final pictures show that the rightmost lever is locked twice:

Here is picture of the full frame in this situation ...

... and here is a picture of the two dependency chains that start at one tappet and force wedges and connecting rods to the right so that the rightmost tappet is doubly locked:

This is by no means the high end of tappet locking—much more elaborate and even tricky locking beds are possible and necessary for large signal boxes. If you are interested in the intricacies of large interlockings, you might want to read pages 270 to 300 of Railway Signal Engineering (Mechanical), by Leonard P. Lewis, published in 1912. Be warned: It might take you a week or two if you want to understand each line of text.

And that's all from our 2013 "signal box" vacation in England!

Ketton signal box, 2013

Deutsche Version dieses Postings

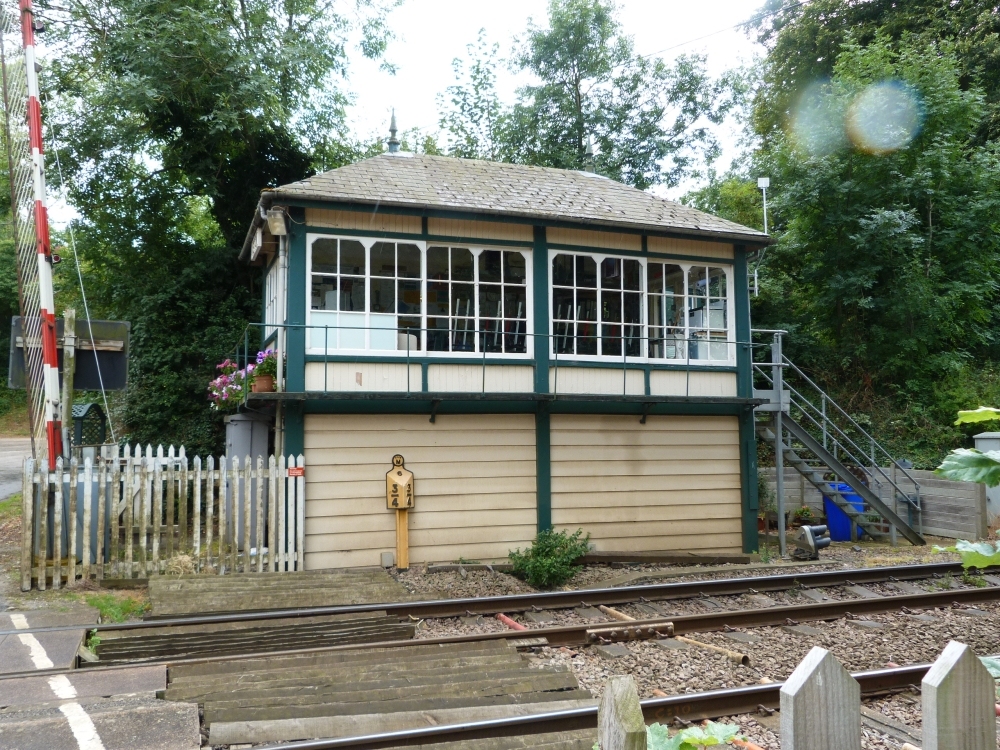
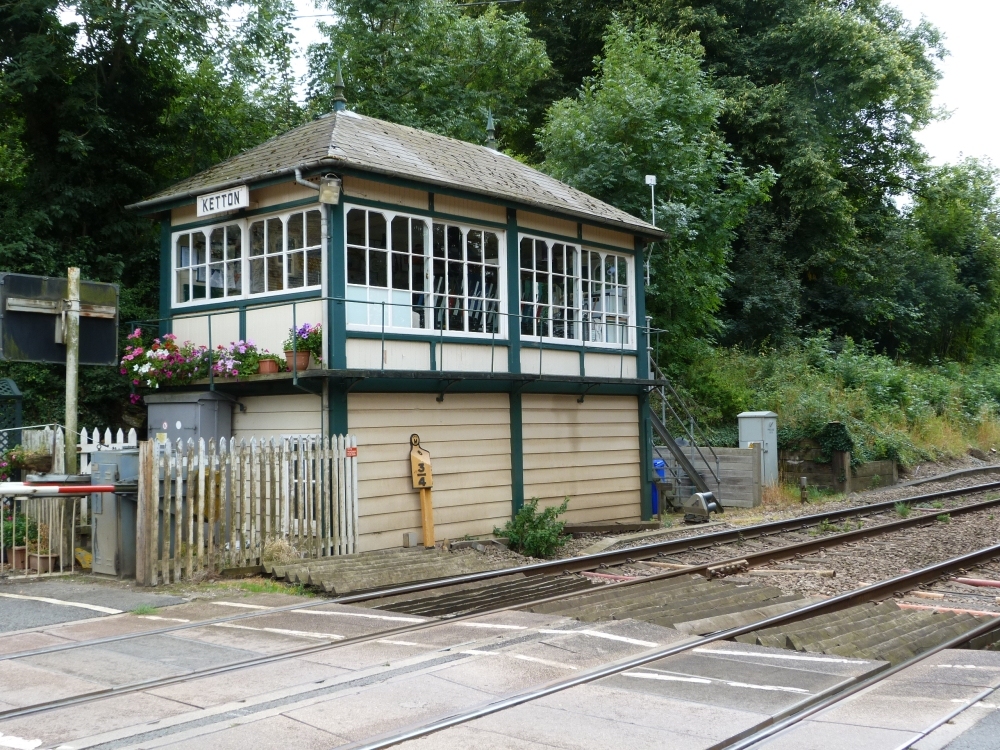
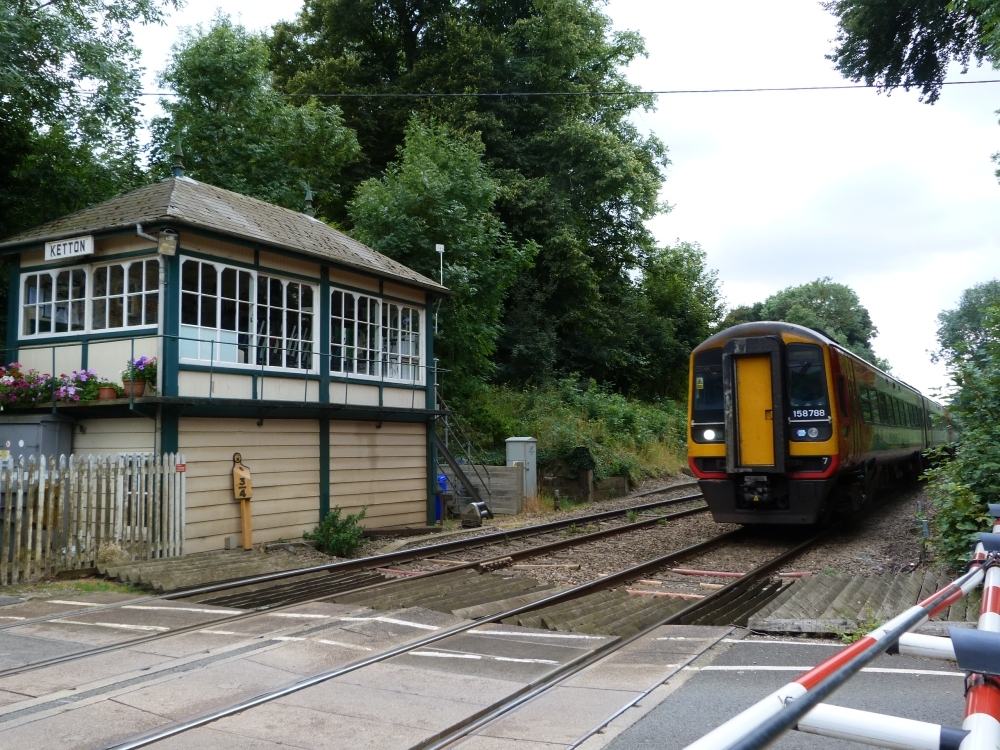
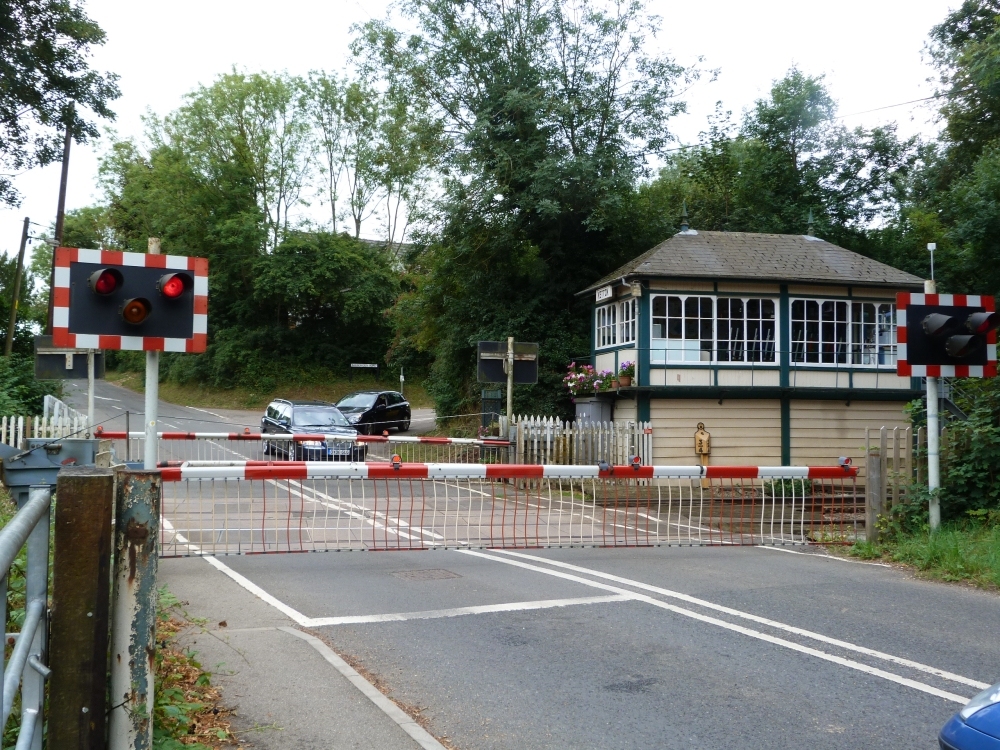
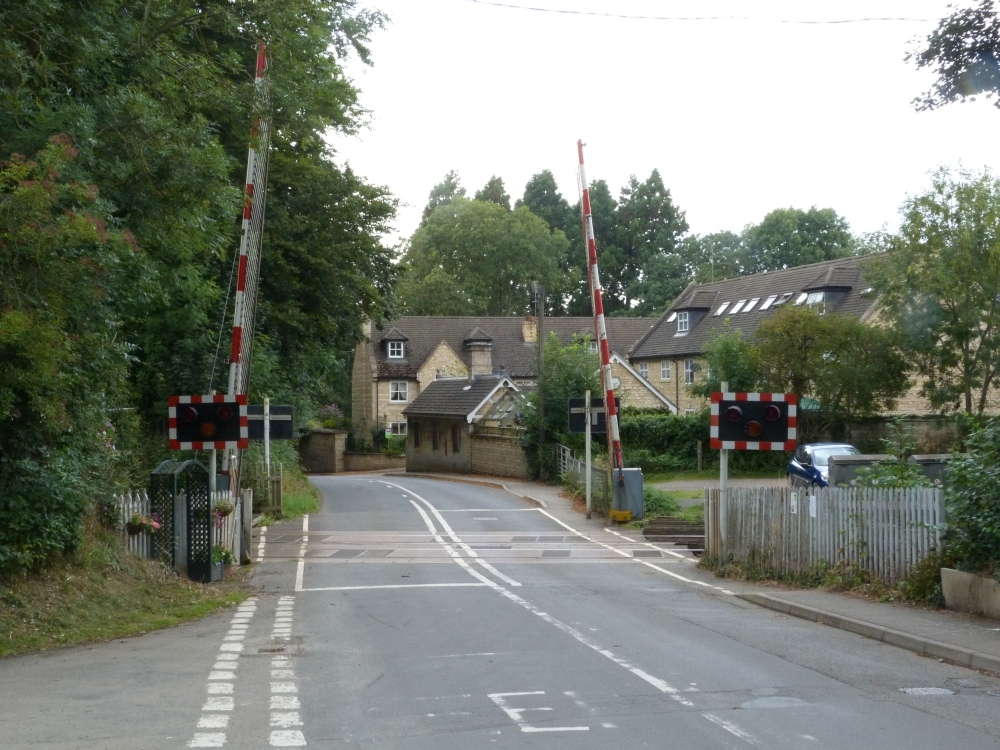
Here are a few photos from an operational signal box with a traditional lever frame. Ketton signal box is on the Birmingham to Peterborough line, next to a level crossing, which it controls together with a crossover and a track into a cement factory:

Ketton signal box, August 2013

Ketton signal box, August 2013

Ketton signal box, August 2013

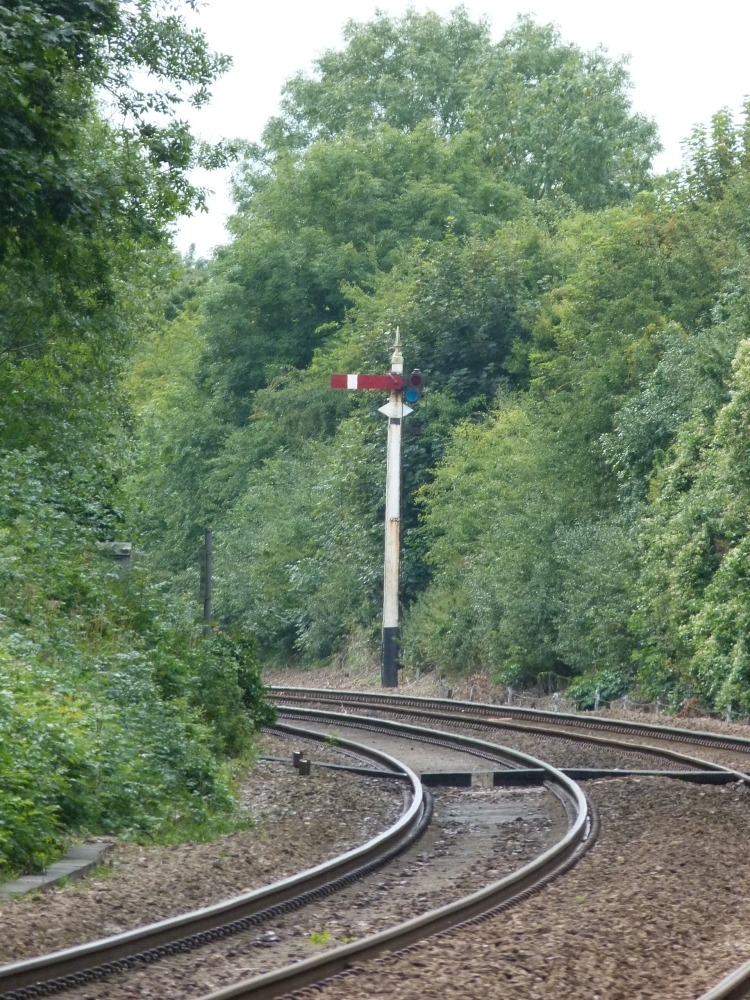
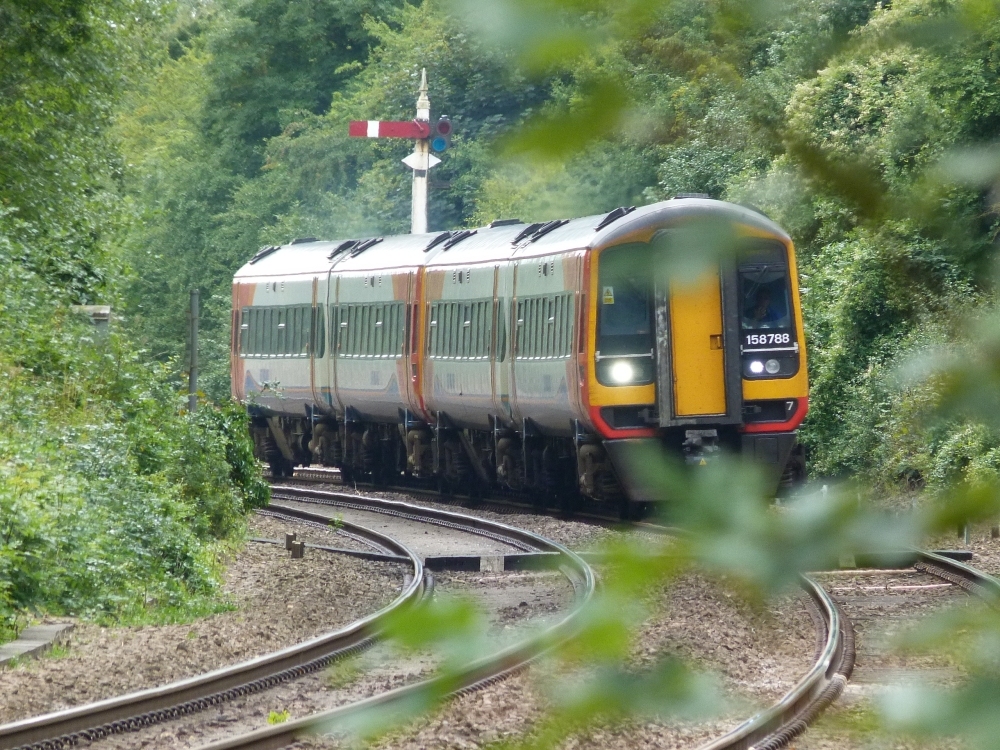
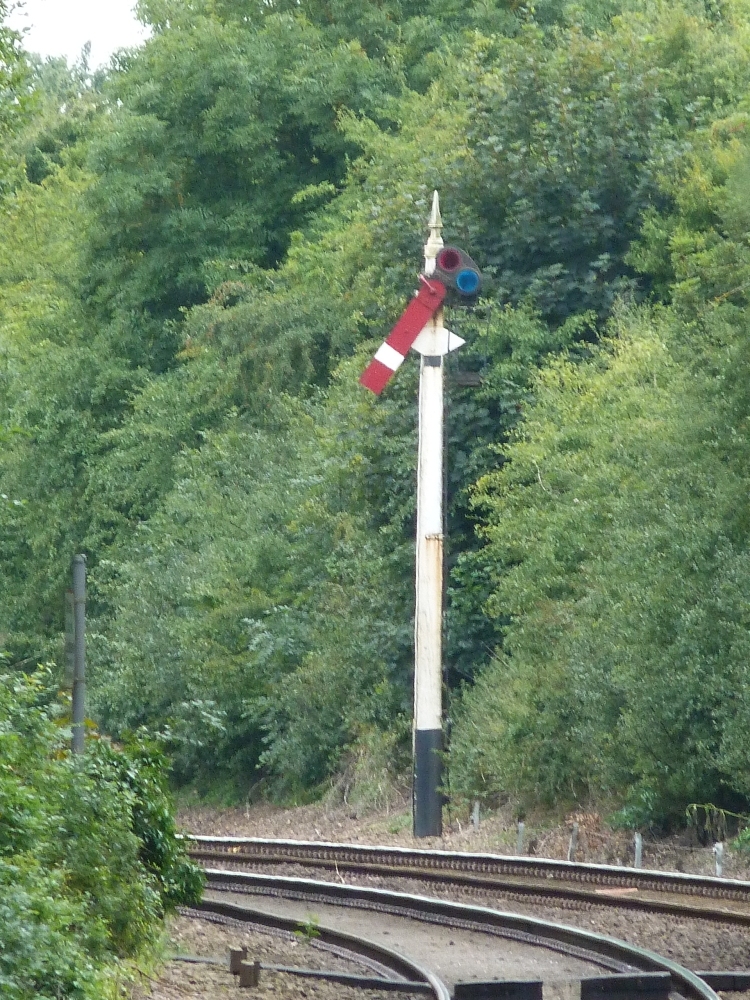
The most interesting feature of the Ketton signal box is a lower quadrant semaphore in a tight curve. Because of that curve, it is placed on the wrong side of the track, namely next to the right track, although of course it controls train movements on the left track!

Semaphore, Ketton, August 2013

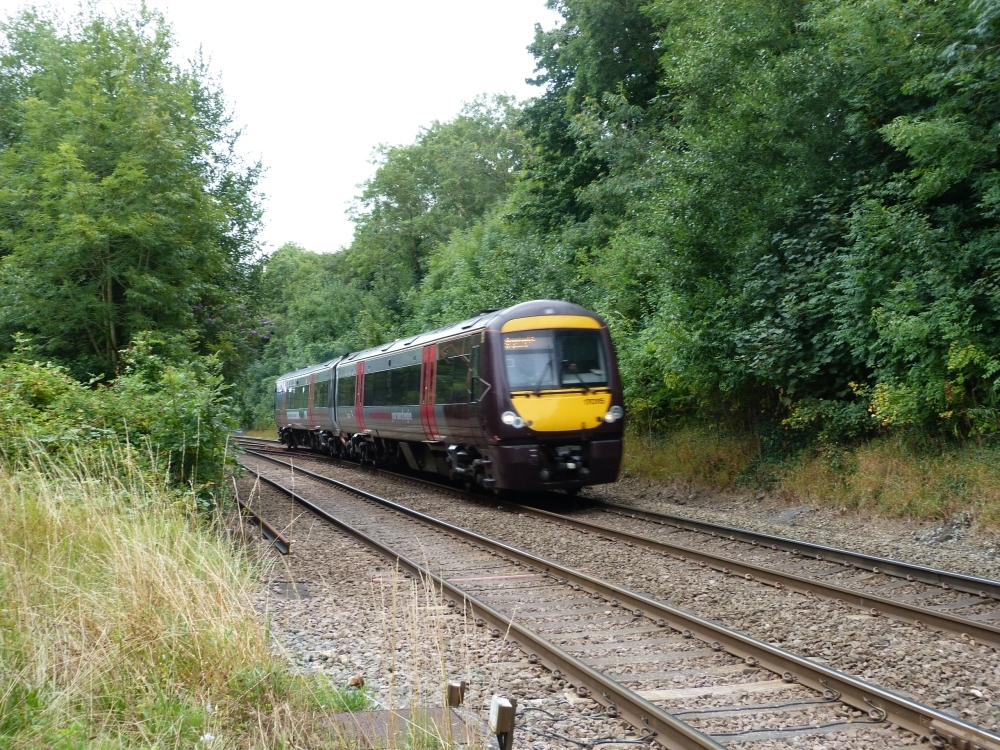
Here is a train coming from the west. One can see that the signal is high enough so that it can be seen from a train on the left track even if there is another train on the right track:

Semaphore, Ketton, August 2013

Ketton signal box, August 2013

A short time later, another train is going in the opposite direction—unfortunately, I did not catch it at the signal:

Semaphore, Ketton, August 2013

Level crossing, Ketton, August 2013

Ketton, August 2013

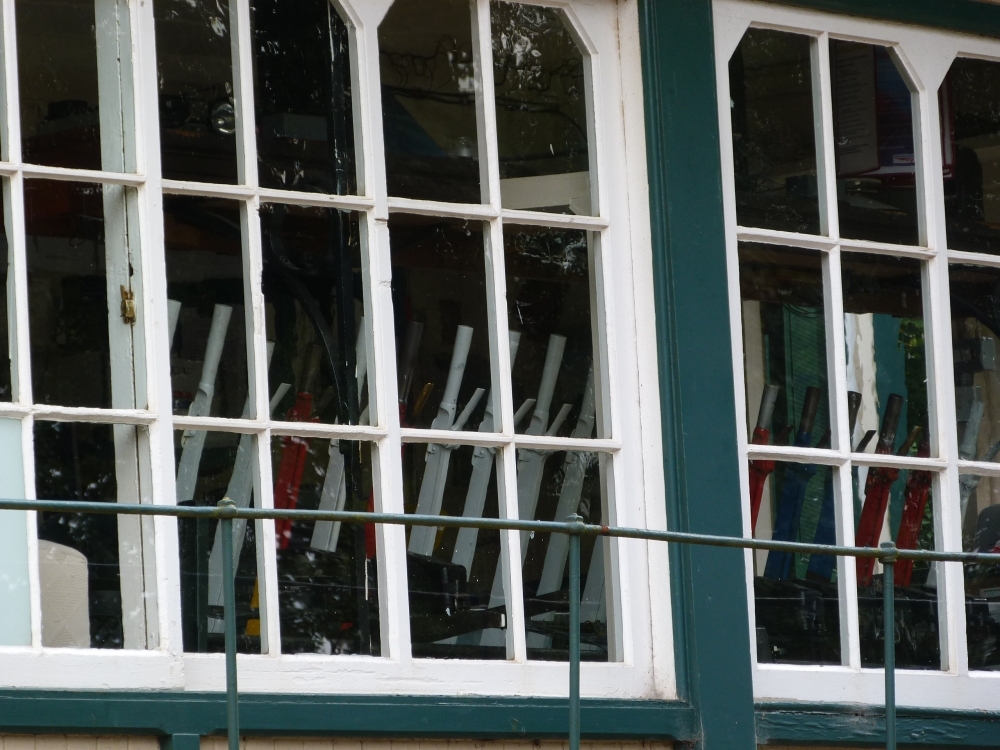
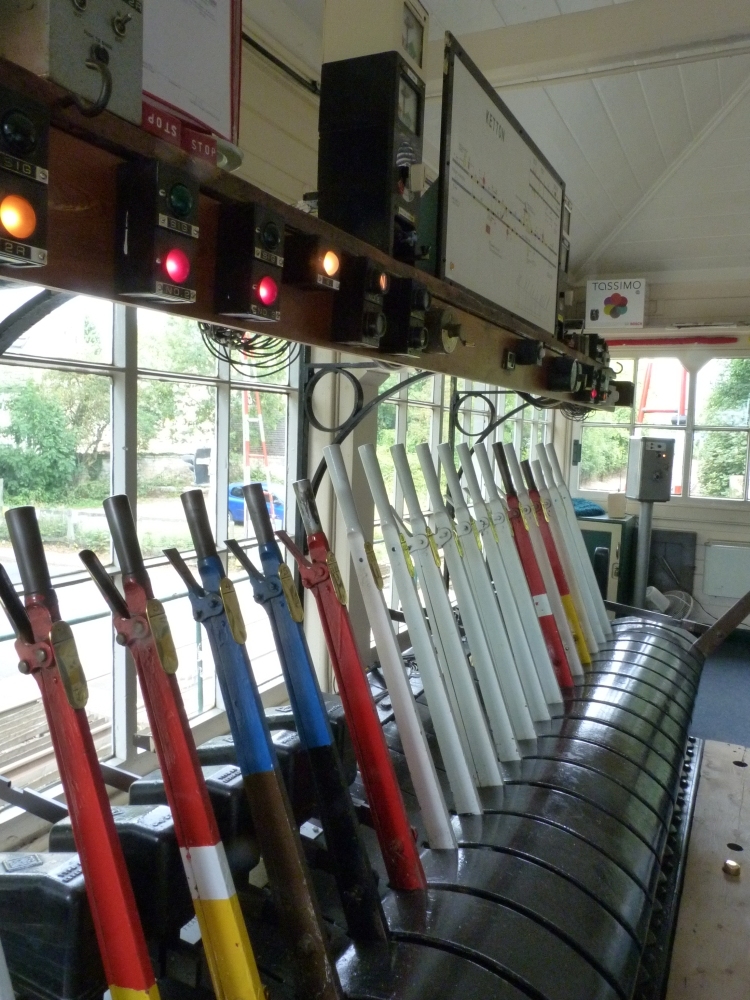
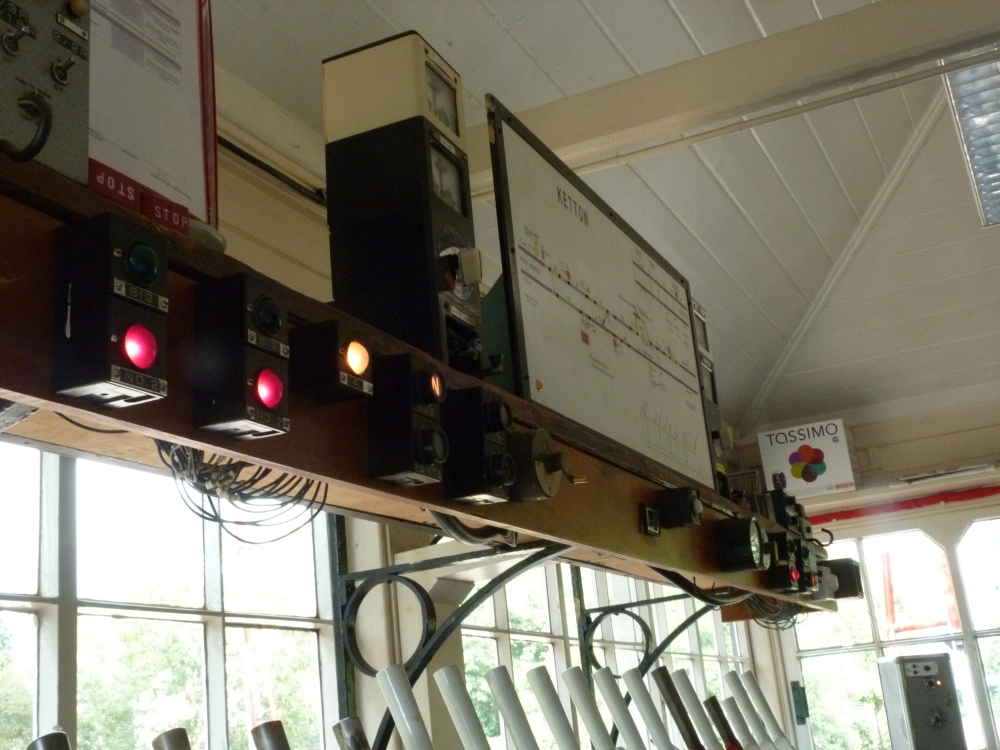
And here are a few photos of the frame in the signal box. Almost all operational levers (but not the white spares) have shortened handles to indicate that they work electrically controlled devices. The one exception is the lever for the semaphore which can be seen right after the row of spares:

Ketton signal box, August 2013

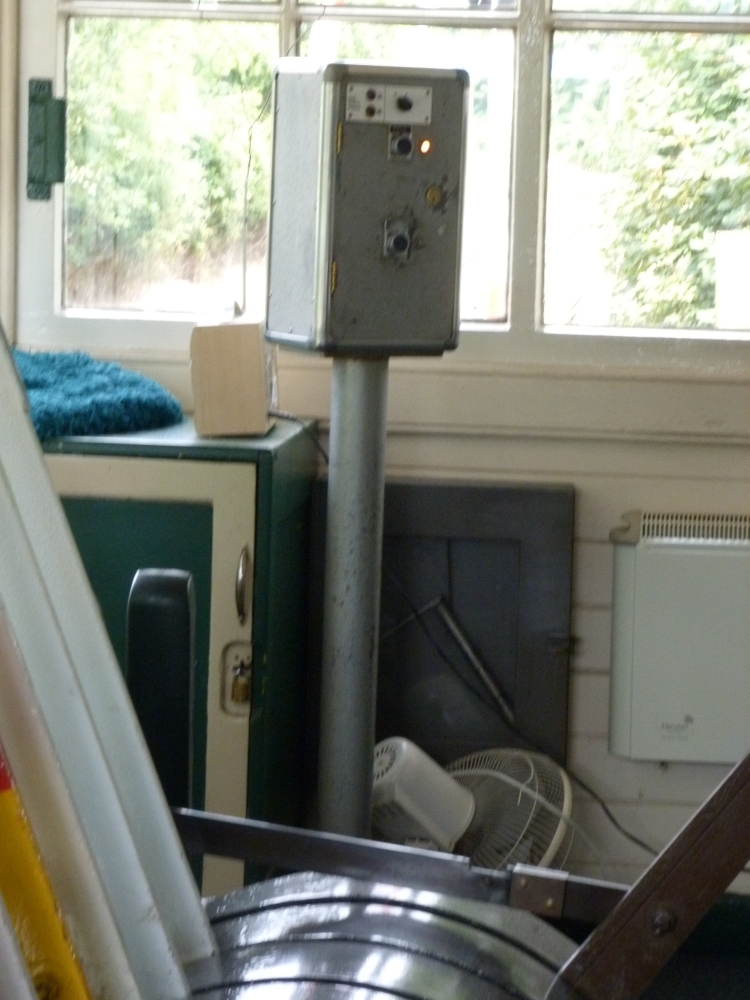
This is, as far as I know, the control stand for the barriers:

Ketton signal box, August 2013

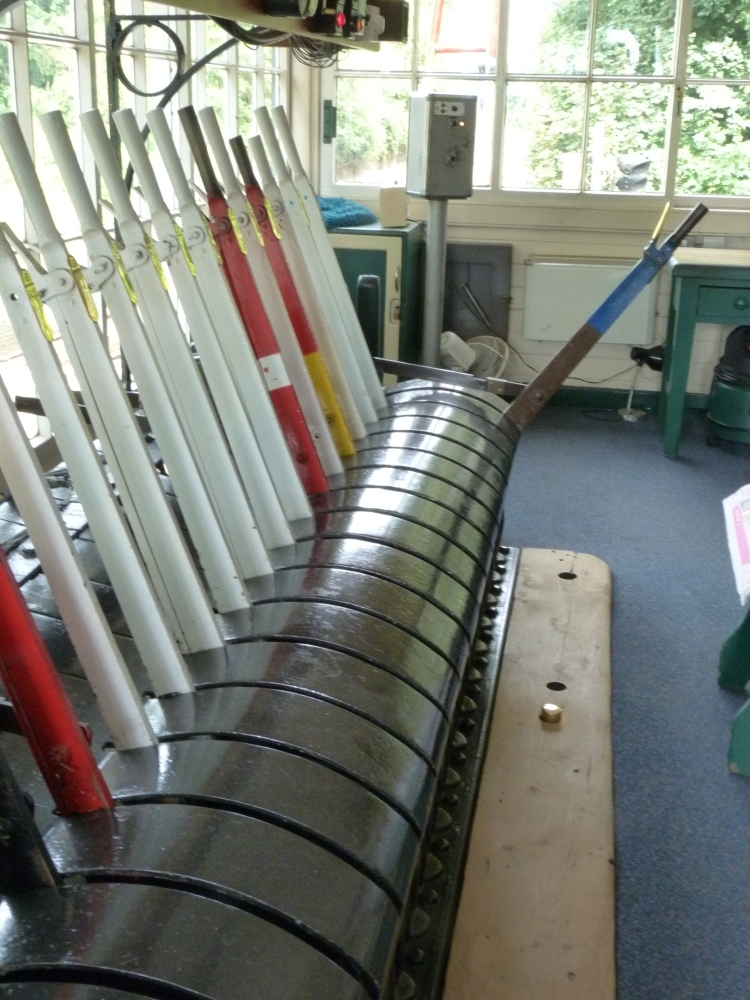
The blue lever that is reversed here unlocks a ground frame for points leading into the large Ketton cement works—obviously, a train is shunting there, but I had forgotten to take a photo when it had rumbled by a few minutes earlier:

Ketton signal box, August 2013

Here is the block shelf with the track diagram:

Ketton signal box, August 2013

And here is a final shot of the tranquil surroundings of the level crossing:

Ketton level crossing, August 2013

Friday, January 10, 2014

Mangapps Railway Museum, 2013

Deutsche Version dieses Postings

Back to signalling! On the 23rd of August, we visited John Jolly's Mangapps Railway Museum:

Mangapps Railway Museum, 23.8.2013

Of course, I immediately went to the large lever frame in the main hall, and this time, our children came with me:

Lever frame, Mangapps Railway Museum, 23.8.2013

Lever frame, Mangapps Railway Museum, 23.8.2013

Lever frame, Mangapps Railway Museum, 23.8.2013

Lever frame, Mangapps Railway Museum, 23.8.2013

Here are the lower ends of the levers below the signal box's flooring. You can see that a few levers are connected to signals in the museum:

Lever frame, Mangapps Railway Museum, 23.8.2013

This is a standard tappet frame, where the tappets are directly connected to the levers, like the ground frame at NVR's Wansford. In the upper leftmost tappet, one can see a cut:

Lever frame, Mangapps Railway Museum, 23.8.2013

Here are the two locking beds, with all the levers in their normal position:

Lever frame, Mangapps Railway Museum, 23.8.2013

And here one lever has been reversed so that its tappets have been pushed through the locking beds:

Lever frame, Mangapps Railway Museum, 23.8.2013

It might be that this signal has been pulled down by that reversed lever—but it could be any other of the multitude of signals shown here in front of a gallery of station signs:

Signals and station signs, Mangapps Railway Museum, 23.8.2013

Signals and station signs, Mangapps Railway Museum, 23.8.2013

Signals and station signs, Mangapps Railway Museum, 23.8.2013

Signals and station signs, Mangapps Railway Museum, 23.8.2013

Mangapps has a huge collection of "things" on display—for example, here are many single line tokens ...

Single line tokens, Mangapps Railway Museum, 23.8.2013

... and a few corresponding block apparatus:

Token apparatus, Mangapps Railway Museum, 23.8.2013

On the far side of the tracks, there is a small signal box with a few different lever frames crammed into it (this signal box does not operate the operational points and signals—it would be too far away from the main building for practical operations):

Signal box, Mangapps Railway Museum, 23.8.2013

Inside there is this collection (unfortunately, I did not write down the different makes of frames):

Lever frames in signal box, Mangapps Railway Museum, 23.8.2013

Lever frames in signal box, Mangapps Railway Museum, 23.8.2013

On the left, there is a gate wheel, and below the windows, you can see a few signal wire tensioners:

Lever frames in signal box, Mangapps Railway Museum, 23.8.2013

Here is the gate wheel again. It seems that it once had a direct connection to the locking beds via a sort of lever—however, I do not see that lever here:

Gate wheel and levers, Mangapps Railway Museum, 23.8.2013

The third of the four frames had a sort of tumbler-like locking bed, whose rusty remains can be seen here. If I understood John Jolly correctly, nobody knows really how it is supposed to work.

Update 18.9.2019: This is a McKenzie&Holland locking bed:

, Mangapps Railway Museum, 23.8.2013

Above the levers in the signal box, there are a few block instruments:

Block instruments, Mangapps Railway Museum, 23.8.2013

Block instruments, Mangapps Railway Museum, 23.8.2013

And in a shelf, there are a few of those large British signal relays:

Signal relay, Mangapps Railway Museum, 23.8.2013

Signal relay, Mangapps Railway Museum, 23.8.2013

Mangapps runs a train on a short line stretching into the fields. Here that day's consist pulls up to the platform, with its caboose(!) from Canada(!!), which they brought over a few years ago, at its end:

A Canadian caboose in England, Mangapps Railway Museum, 23.8.2013

A Canadian caboose in England, Mangapps Railway Museum, 23.8.2013

Here is the outlook from the caboose during the short travel:

Going out into the landscape, Mangapps Railway Museum, 23.8.2013

Going out into the landscape, Mangapps Railway Museum, 23.8.2013

At the end of the line, a hare was disturbed by our train—not an uncommon sight on railway lines, as can be seen in a video in this posting on my Austrian blog:

Going out into the landscape, Mangapps Railway Museum, 23.8.2013

Near the platform, there is a small signal box that operates a few points:

Ground frame in a small signal box, Mangapps Railway Museum, 23.8.2013

Many small, nicely painted locos are standing near the signal box (it is always astonishing that a "small loco" has a weight of at least a medium-sized truck, and even a "medium sized" locomotive can be heavier than the maximum allowed weight of a lorry):

Locos, Mangapps Railway Museum, 23.8.2013

If you look closely, you can see an "Einheitssignal" from Poland lying in front of these two nicely painted locomotives:

"Einheitssignal" from Poland, Mangapps Railway Museum, 23.8.2013

Finally, we had a small picnic there ...

Picnic at Mangapps Railway Museum, 23.8.2013

... and I took a photo of the unsuspecting owner of all this, John Jolly:

John Jolly, Mangapps Railway Museum, 23.8.2013