The final destination on our trip to Switzerland was the largest: Biel's marshalling yard or "Rangierbahnhof", abbreviated Biel RB. As of today—2017—Biel RB has the last operational signal boxes in Switzerland that are equipped with semaphores and mechanical points. The reason for the survival of this old technology seems to be that it is still not clear whether the yard will be completely closed (so that any modernization would be lost money), or whether, and how, some part of it will continue to be used. However, the yard is definitely no longer used for its original purpose of marshalling—in contrast to 1988, when I photographed the signal boxes and wagons running down the small hump.
The following text, like many before, again contains interesting comments by Hanspeter Thöni, which are shown in italics.
The following diagram shows an overview over the track groups of the yard. If you are interested, you can compare it to the current track plan at openrailwaymap.org or satellite photos at maps.google.com (a click on the diagram opens a readable PDF):

- On the far right, one can see the junction at Biel Mett, where the track from the yard connects to the main line.
- Group A was the arrival and departure group.
- Group E contained the marshalling tracks; the wagons were pushed from group A over a small hump into the E tracks.
- Group D was a detail marshalling group, where cars would be pushed in from the shunting neck at the end of E.
- Group G contained loading and storage tracks at the goods shed and a few team tracks.
- Finally, a maintenance shop was located behind the yard.
Regarding the position of points hut 6, I am somewhat unsure—but the aerial view at Google Maps seems to confirm it.
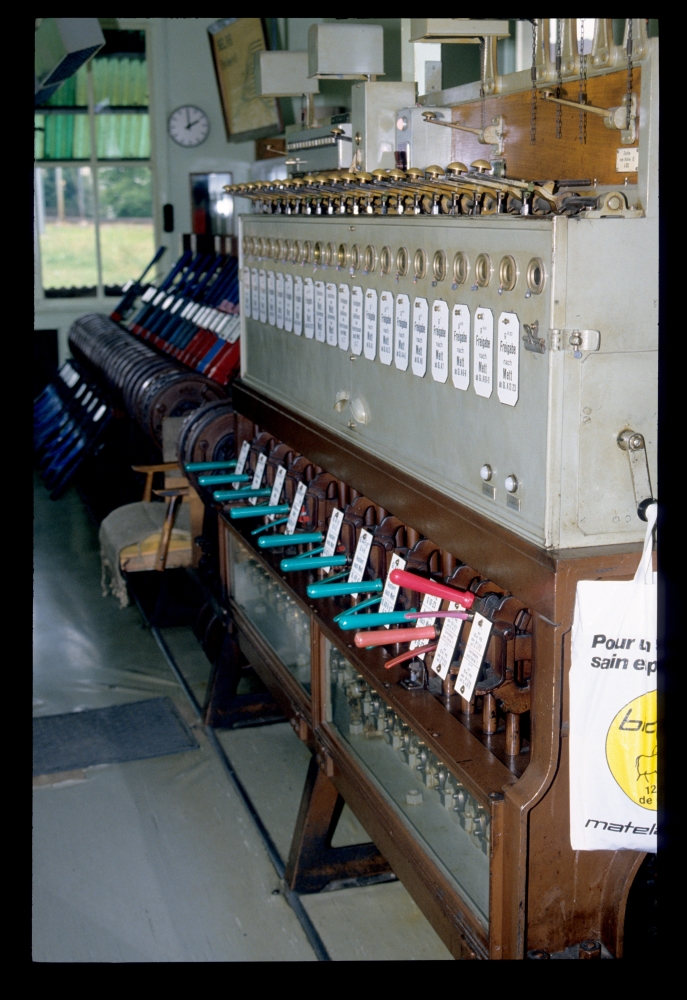
The first four of the following pictures show the Integra interlocking frame at Biel Mett. Something had to be repaired or checked there, so that I could take a few shots of the inside.
The interlocking apparatus appears to be one of the latest that had been built. The pluggable relay sets for the points had only been developed in 1953, which was a short time before the start of the era of entry-exit interlockings. Therefore, only a handful of Integra frames were equipped with these relay sets. The "battery changer" (the contacts switching between the motor and the control voltage) was no longer reversed mechanically, as in all previous frame generations, but electrically. Its main part are the contact sets interlocking each other above the cube. Also the grey wiring indicates a newer frame. Older ones were wired with wires with black insulation.
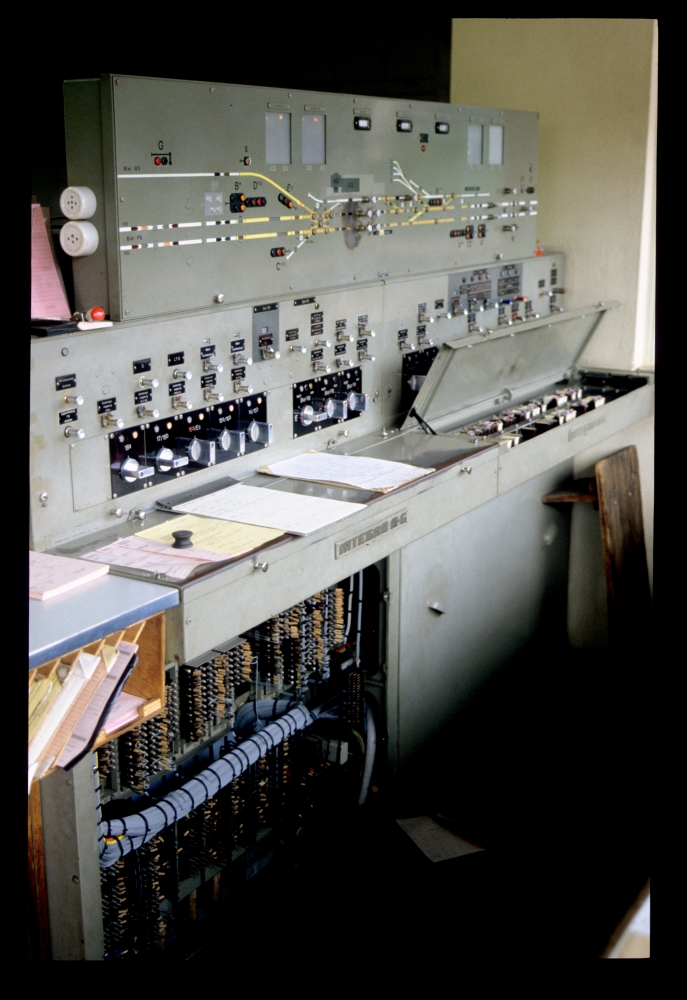
Integra frame, train bureau, Biel Mett, 23.8.1988
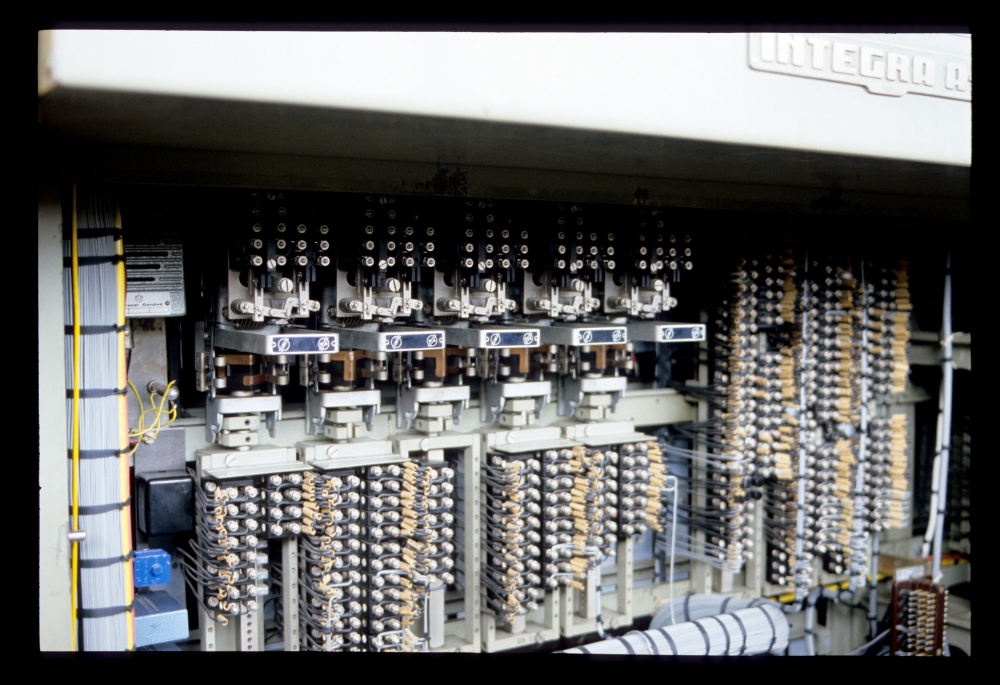
Integra frame, train bureau, Biel Mett, 23.8.1988
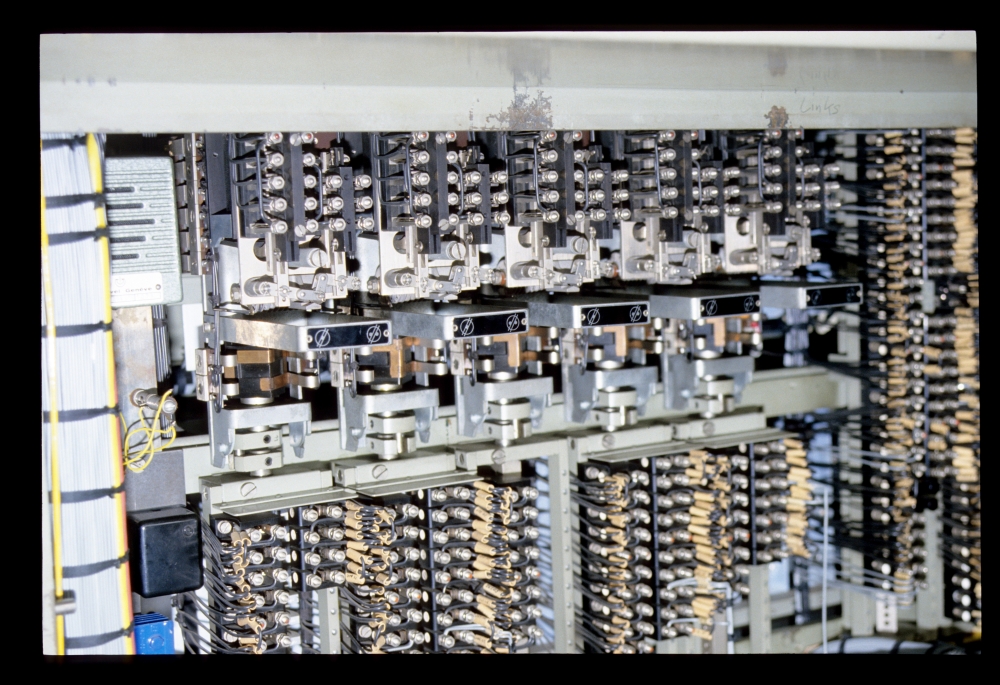
Integra frame, train bureau, Biel Mett, 23.8.1988
The leftmost of the three route switches has been reversed to position "von Biel RB"—a train will be coming through from the yard shortly over double-slip switch half 18a.
Incoming route from Biel RB: Biel Mett only sends an approval to Biel RB. Therefore, the route switch can be turned only to the 45° position, as it only has a route locking function, but not a signal clearing function.
Outgoing route to Biel RB: In this case, Biel RB must send an approval. As far as I can see, the green "coupling circuit lamp" was placed above the corresponding route switch in the middle. The right lamp seems to be the approval indicator from Biel RB. The first image above, with a route set towards Biel RB, has this lamp on
Signal indicator G is also an interesting feature. It seems that a single bit of information was transmitted from Biel RB to Mett, so that the train director at Mett recognized that the signal at Biel RB had been cleared. Because of the short distance, the stations were lying back to back, and therefore, no line blocking was in place.
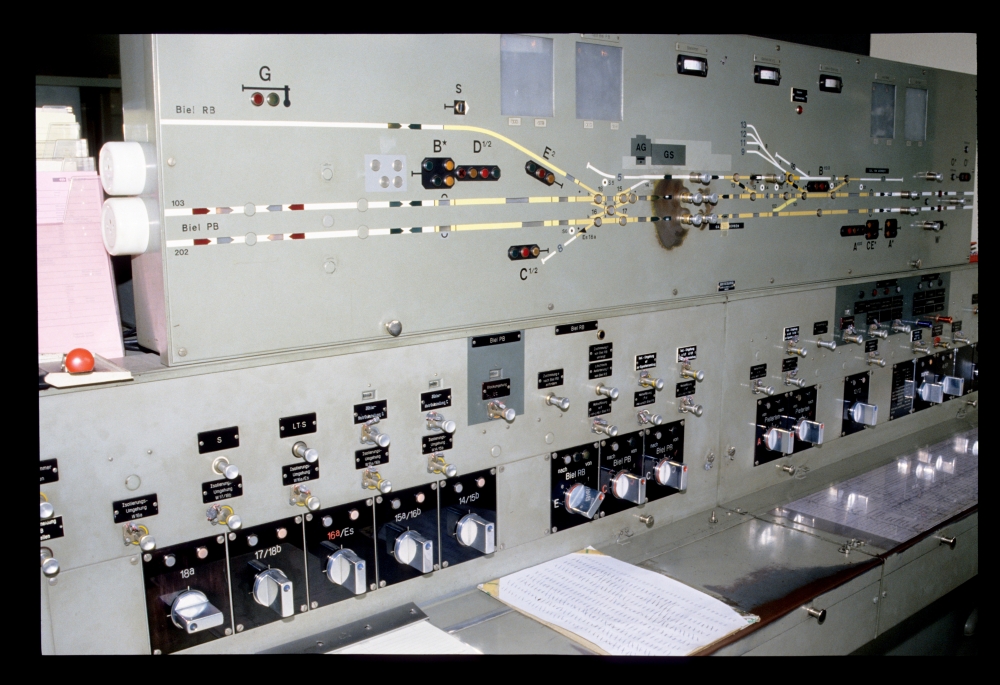
Integra frame, train bureau, Biel Mett, 23.8.1988
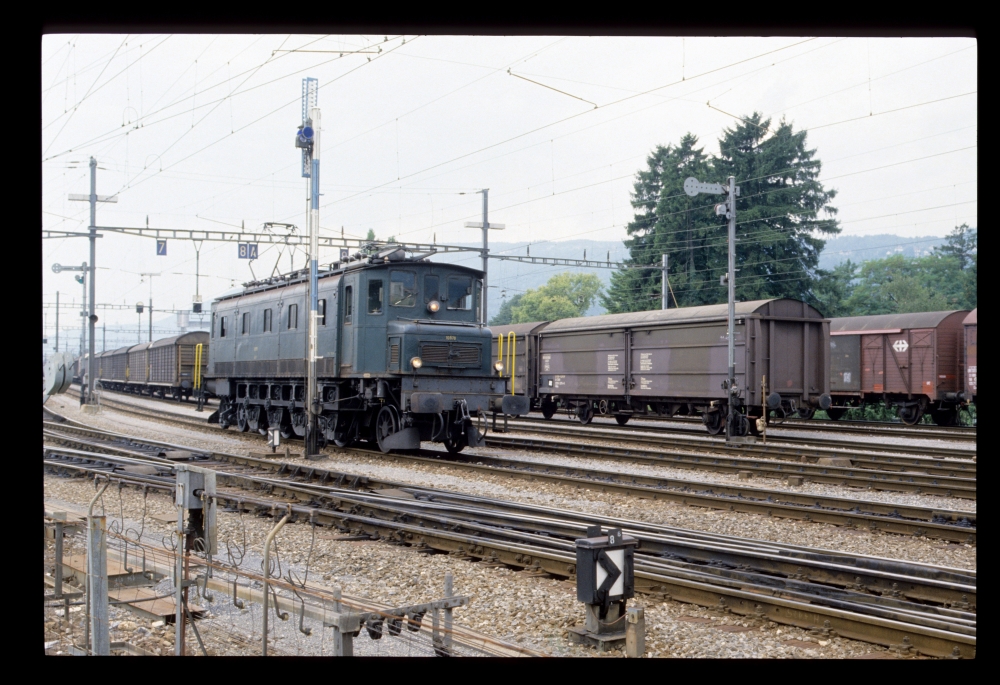
And here is the train:
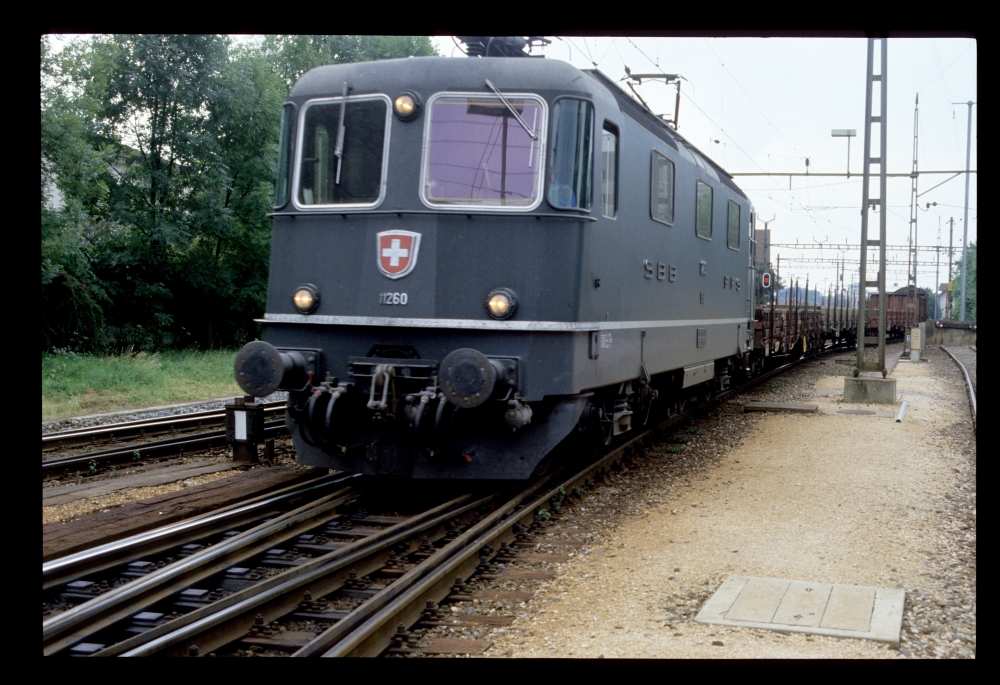
SBB Re 4/4 II 11260 with goods train, Biel Mett, 23.8.1988
This somewhat truncated picture shows the station building:
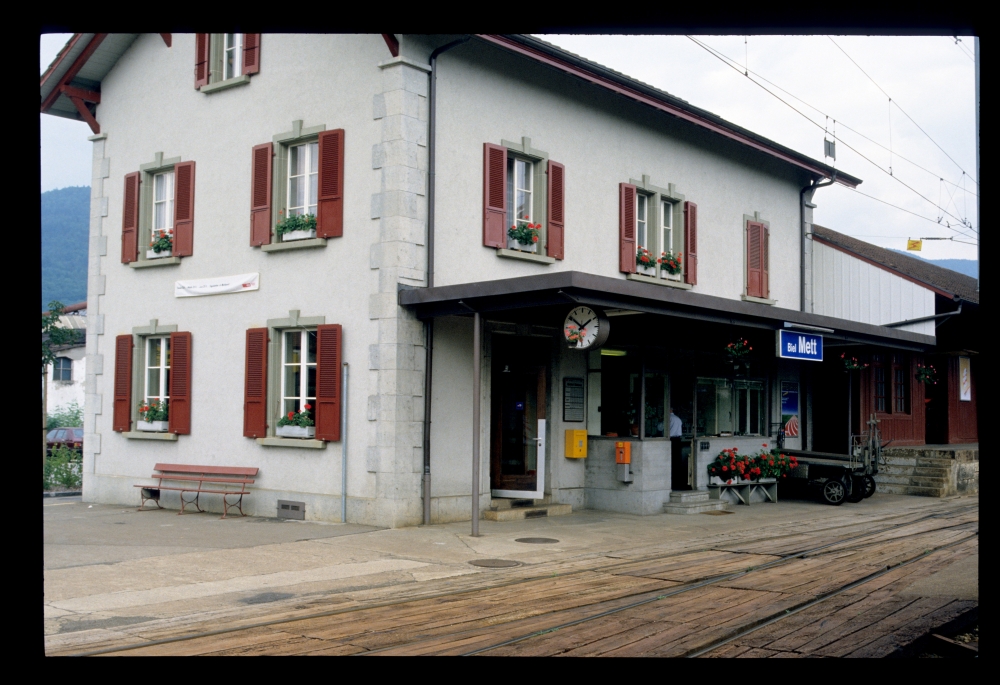
Station building, Biel Mett, 23.8.1988
From Biel Mett, I started my walk towards Biel RB yard. This "tractor" was on duty at the eastern throat:
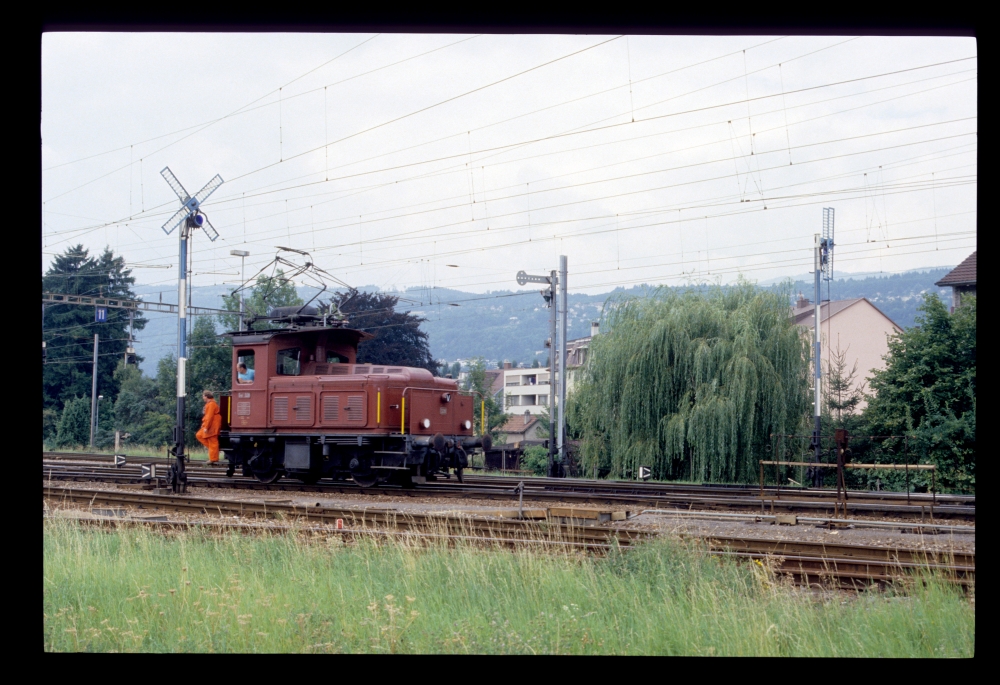
SBB Tem 328, Biel RB, 23.8.1988
And the following image is already from signal box 1. A read approval lever for allowing incoming routes from Biel main station ("Biel Personenbahnhof") or Brügg has been reversed to its upper position:
Station blocking, signal box 1, Biel RB, 23.8.1988
Here one can see part of the frame. The colours of the levers were not religiously adhered to, it seems: The lever for shunting signal R3 is not red, like all others, but blue. And between the levers, there is some space for a comfortable chair, for more quiet hours of operation.
The blue lever for the shunting signal appears to have been a temporary feature. On a later picture by Simon Gander, all levers are correctly painted once again.
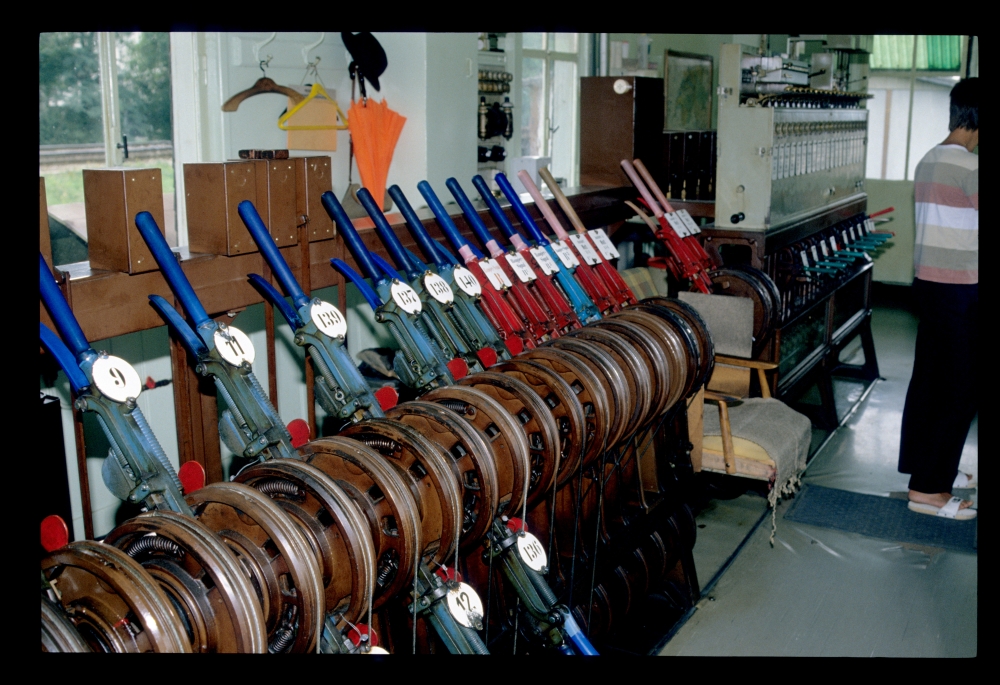
Lever frame, signal box 1, Biel RB, 23.8.1988
In the track plan, one can discern not only the four common starting signals, but also the humping signals M3 and M4 as well as four shunting signals R and R1 to R3. The symbols of the latter, with two "feet", indicate that they are relevant not only for one direction, but actually are "clearing signals" which require shunting to stop on certain tracks and points when displaying "shunting prohibited":
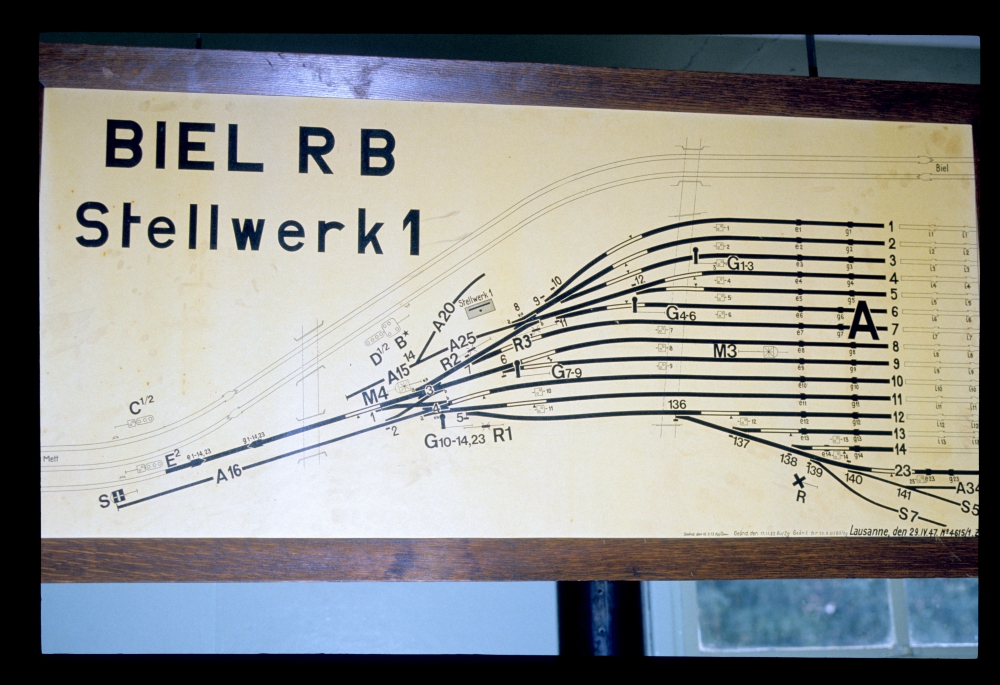
Track diagram, signal box 1, Biel RB, 23.8.1988
Jüdel's "block locks" ("Blocksperren") with their shining metal parts have always fascinated me, especially as the Austrian interlocking types did not have this sort of mechanical logic:
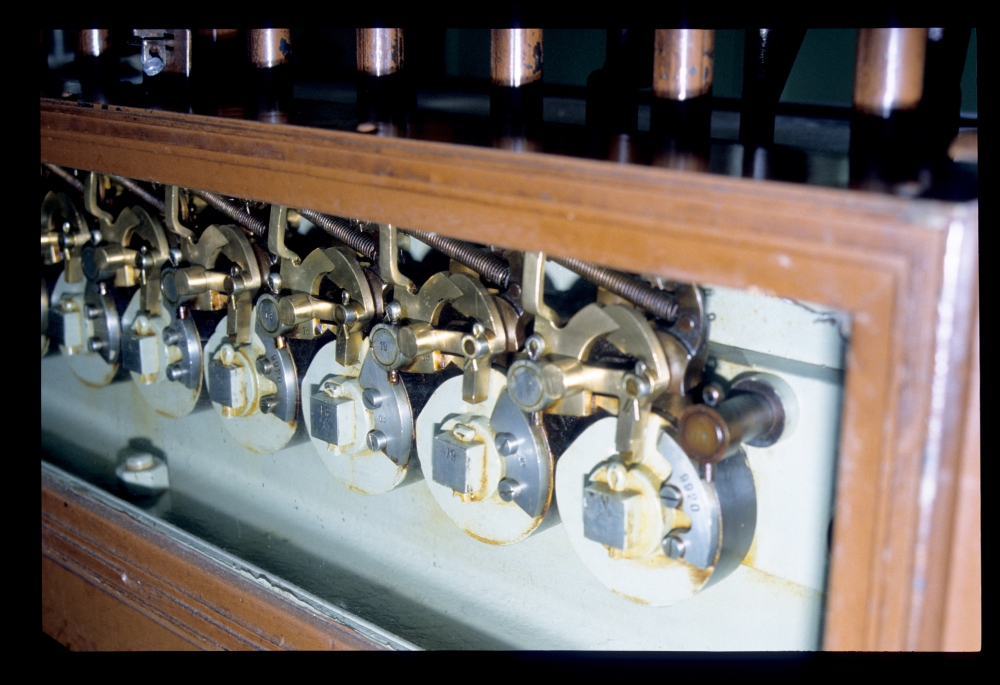
Block locks, signal box 1, Biel RB, 23.8.1988
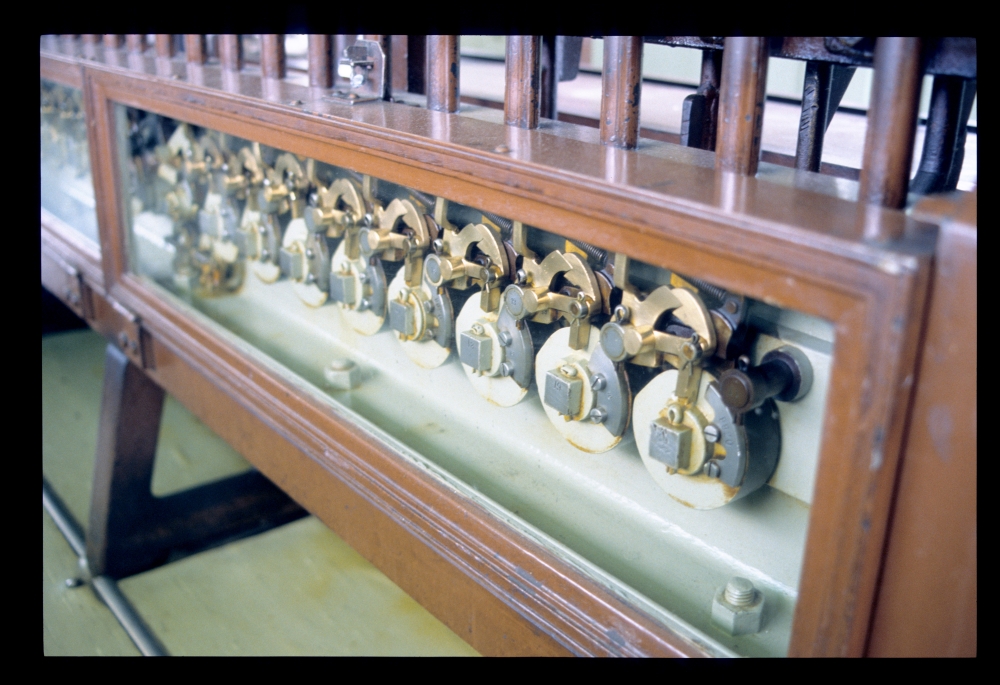
Block locks, signal box 1, Biel RB, 23.8.1988

Block locks, signal box 1, Biel RB, 23.8.1988
And here is a final photograph from this signal box, with an unblocked block instrument for a departing train. Above the block instruments, one can see the toggle switch between manual inductor and 16 2/3 Hz supply for the block instruments: In regular operations, the alternating voltage for the block instruments was transformed down from the overhead voltage of 15 kV, so that pointsmen were saved the manual work of turning the inductor crank.
As almost all lines in Switzerland are electrified, virtually all block instruments had a 16 2/3 supply. Turning the crank was almost never heard of.

Block instruments, signal box 1, Biel RB, 23.8.1988
Two Ee 3/3 were working the hump. Directly to the right of the shunting signal, one can discern the marshalling signal M4:
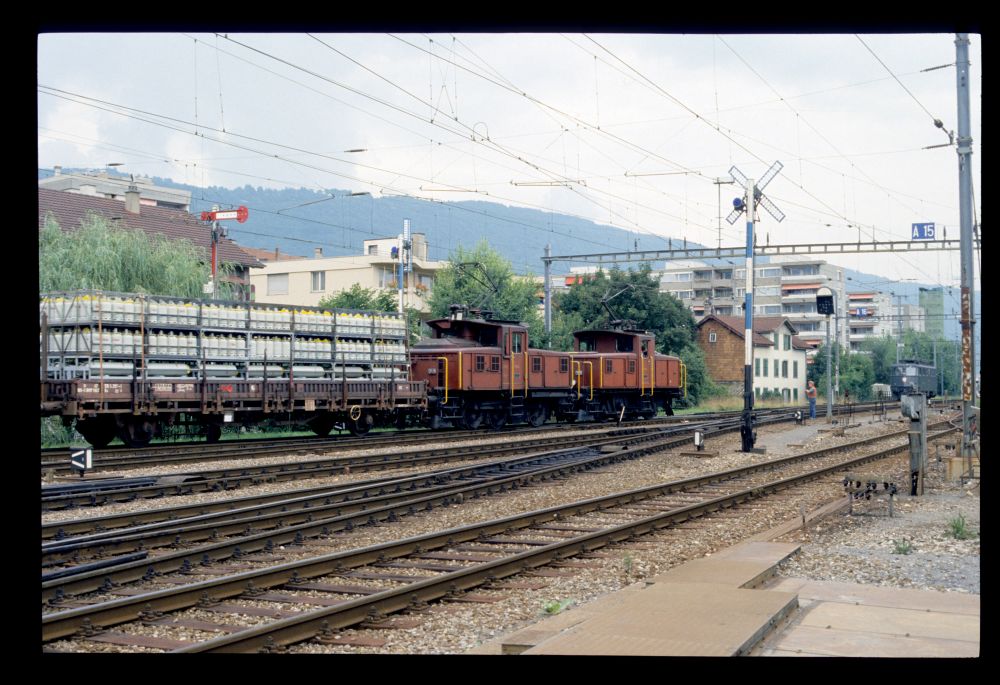
Ee 3/3 165 and another Ee 3/3, Biel RB, 23.8.1988
An Ae 4/7 is waiting here in front of the shunting signal for the arrival of an incoming train. Right now, the signal displays "shunting allowed", ...
Ae 4/7 10978, Biel RB, 23.8.1988
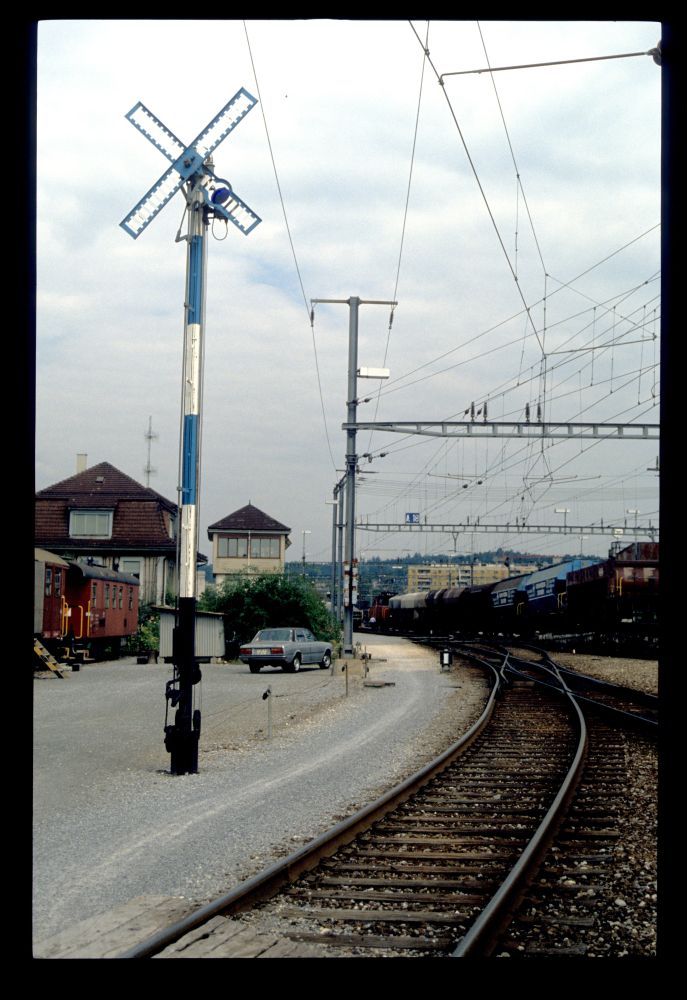
... but a moment later, all the shunting signals have their arms crossed:

Ae 4/7 10978, Biel RB, 23.8.1988
And here (on the far left) the train arrives. At the right, one can see the signal box:
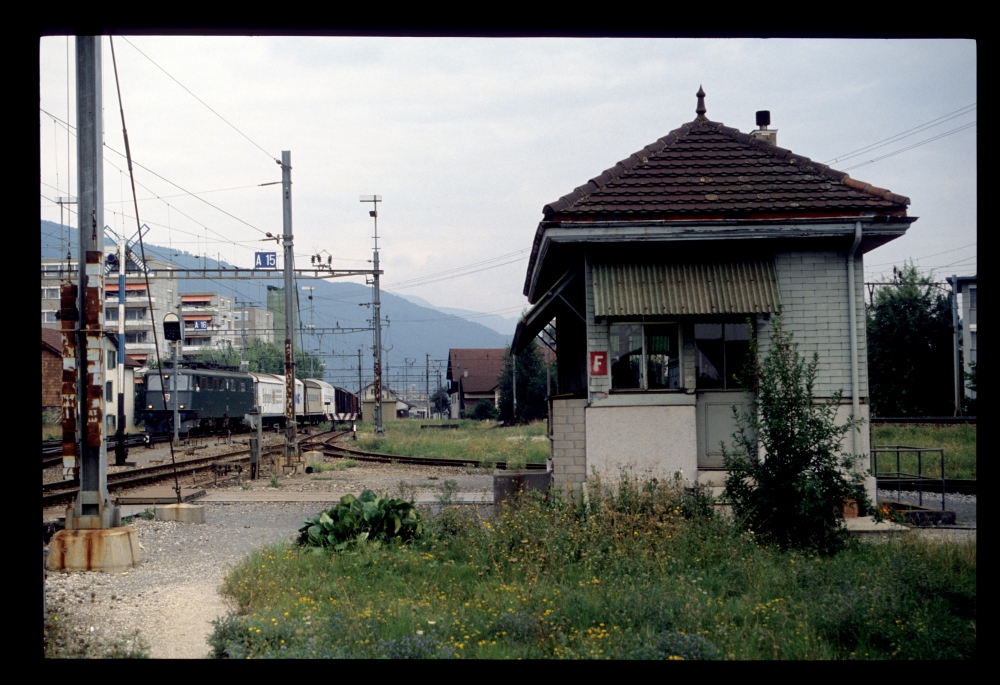
Signal box 1, Biel RB, 23.8.1988
The first of the pictures with the Ae 4/7 shows a nice detail: Whoever had drawn the figures on the label of double-switch slip 8 had put on a mask the wrong way (no, the picture is not mirrored—first, the small "a" would then be to the left of the 8, and moreover, one can see in the full image that the semaphore's arm points in the correct direction):

Points indicator of double-slip switch half 8a, Biel RB, 23.8.1988
Somehow, I found my way to the other side of the yard. My first picture there was the points hut 6:
Points hut 6 (?), Biel RB, 23.8.1988
A lonely shunt signal stood behind the large goods shed:
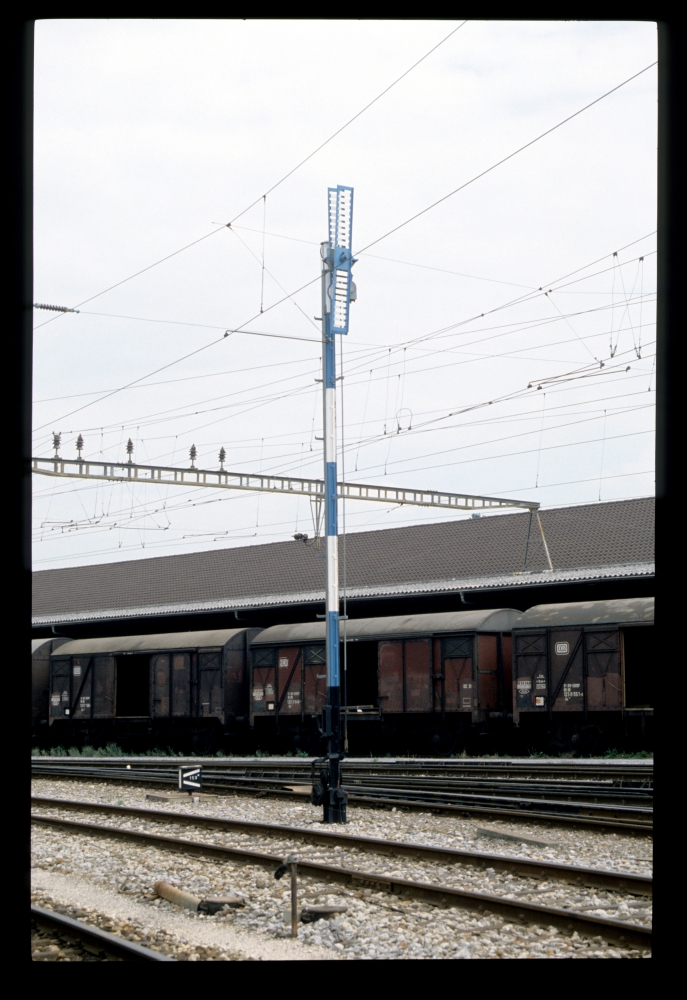
Shunting signal, Biel RB, 23.8.1988
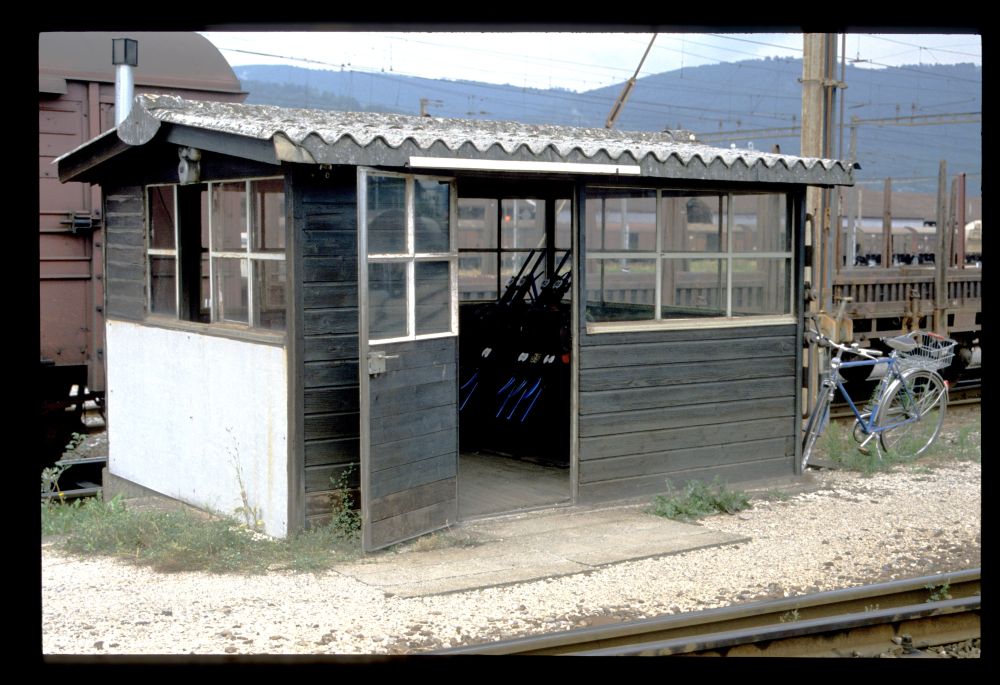
Points hut 4, near the end of the goods shed, was built extremely narrow:
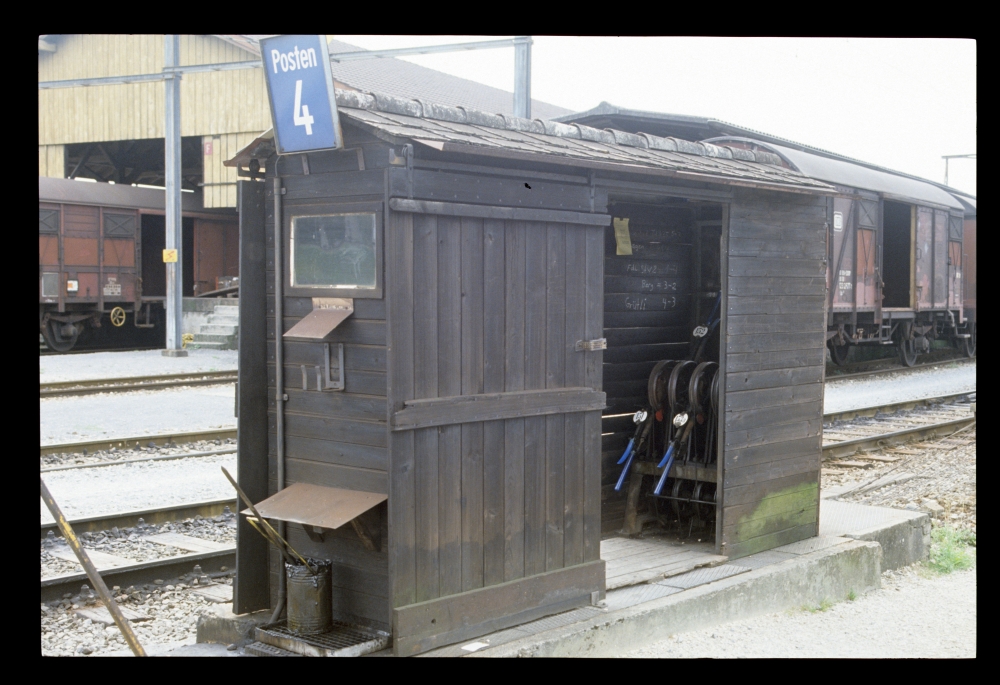
Points hut 4, Biel RB, 23.8.1988
Here are the marshalling tracks. The overpass in the back carries the tracks of the main line over the exit tracks of the yard. A "Feldschlösschen Bier"-wagon (beer!) is just running into one of the tracks:
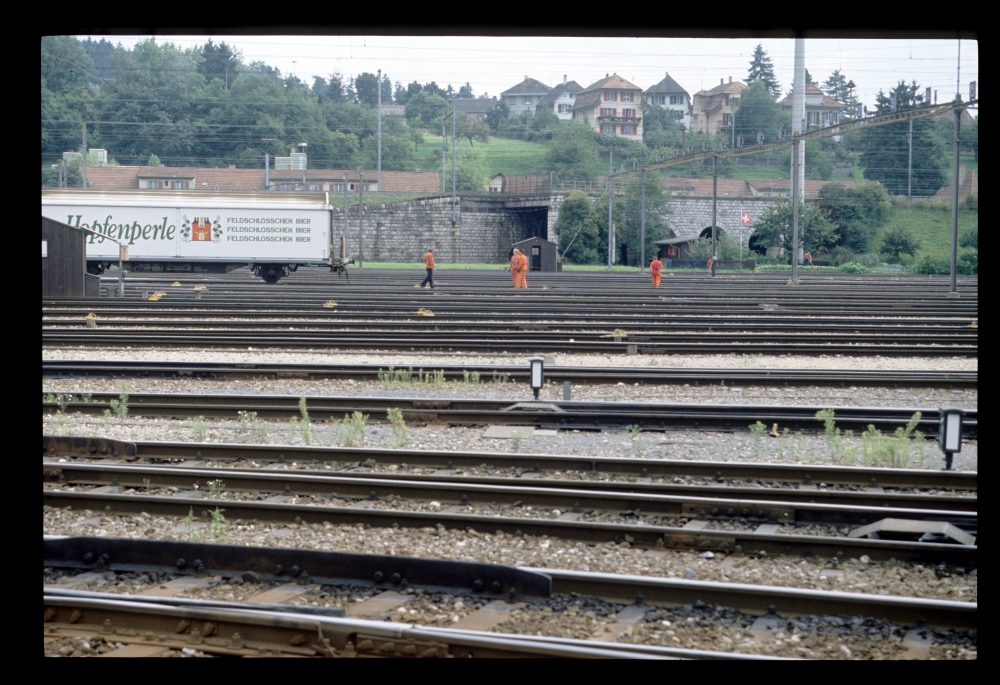
Group E (marshalling tracks), Biel RB, 23.8.1988
A catenary mast has put itself exactly in front of signal box 3, to the left of it one can see the small hump, where two wagons are rolling down:
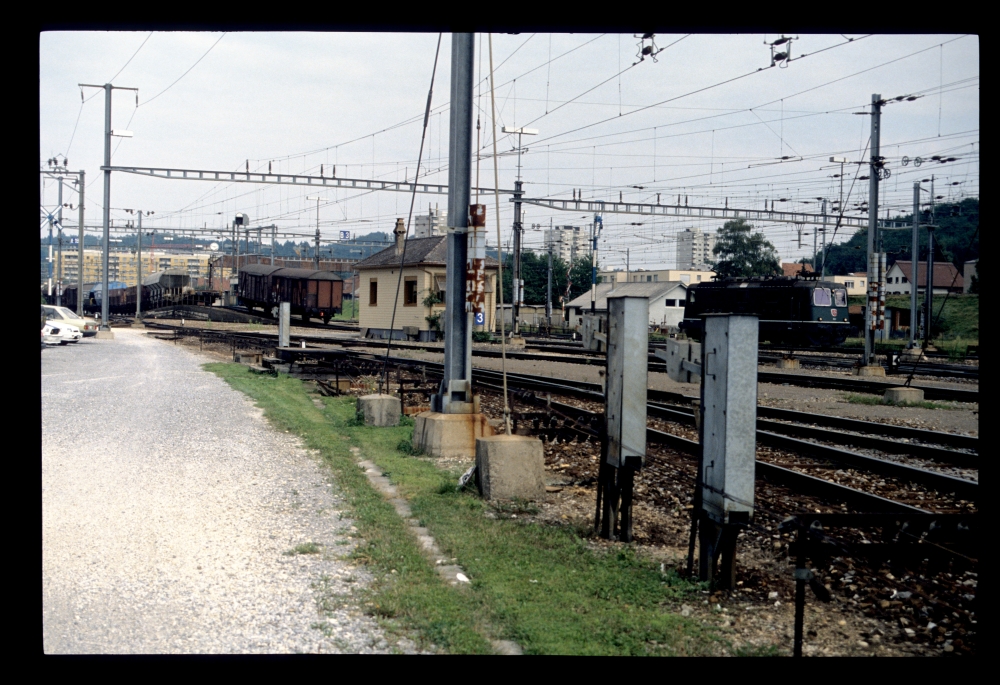
Hump and signal box 3, Biel RB, 23.8.1988
Behind the shunting signal R9, one can see the high building of signal box 2:
Shunting signal R9, signal box 2, Biel RB, 23.8.1988
The next posting will show images from signal box 2, and an interesting pair of wagons rolling down the hump.
No comments:
Post a Comment